9.08.2013
Shredded Beef Sandwich with Jus
Despite an overwhelming love of Arby's, I don't think you can count me as a roast beef sandwich connoisseur. That's not to say I wouldn't like to become one! This sandwich has me well on my way.
The root of the reason is that I've never been much of a beef eater. However, Pure Beef has changed my eating red meat drastically. Whether it was because my mother never cooked much red meat (not so much as a meatloaf, from my recollection) or the frightening plethora of names given to the beast or that the first steaks I tried to cook came out like leather or a slight fear of all meats not totally well-done (gotten over that, thank god).... Whatever the case may be, red meat has never really been on my radar.
Pure Beef rocked my world. Not only did Lynne Curry arm me with some serious knowledge, the recipes are bloody lovely. She has created an avowed beef fan.
I have now picked up things like oxtail, shank, brisket strips, short ribs and beef bones. I've yet to do a 'real' pot roast and I'll probably never grill a T-bone but it's a helluva step forward!
It was oxtail that first got me started on this sandwich I share with you now. As I've noted before, Sanagan's is a great place to pick up meat in Toronto. Unfortunately, the pic above was taken with grocery store oxtail purchased long before my love for Sanagan's began. I think it's worth examining here, however, for the novice beef-eater.
Oxtail is not actually ox meat but the tail of the cow. The nice folks at Sanagan's sell their oxtail in nearly-whole form but were kind enough to chop it into user-friendly 'discs' for me much like what you see above.
Oxtail can be browned and braised like short ribs or stewing beef. But for the ultra-easy, I went for my slow cooker on this occasion. Leftover sauce and meat from any of the above cuts or even a roast would be excellent companions for a crusty bun. The below recipe is an extrapolation of that loveliness but in a less labor-consuming form.
Shredded Beef Sandwich with Jus
Creates enough for a bunch of sandwiches plus some snacky, hot-beef eating.
Please note: While not labor-intensive, this is still a two-day recipe. Plan ahead. This dish could alternatively be made with beef shank.
Day 1
2 lbs oxtail
3 cups beef broth
1/2 onion, chunked
2 cloves garlic, smashed
1/2 Tbsp mustard powder
1 1/2 tsp Worcestershire
1 tsp whole peppercorns
6-7 sprigs fresh oregano
3-4 sprigs fresh thyme
water
Feel free to brown the meat first if you're feeling motivated. I was in a rush. I dumped the raw oxtail in the slow cooker. Add all successive ingredients and enough water to cover by an inch or so. This is not a science; don't worry too much.
Cook on high for five hours.
Carefully strain liquid into a separate bowl. Remove meat from the solids and discard the remaining vegetables and spices.
Now for the messy part. Oxtail has a lot of fat and collagen on the bones; separate it with your fingers to pluck the nuggets of meat out.
Refrigerate the meat and the liquid separately and come back tomorrow.
Day 2
This is the quick day--give yourself approximately 30 to finalize and assemble sandwiches. The following ingredients are noted for one sandwich.
1 1/2 cups reserved beef liquid
3/4 cup reserved beef
1/2 demi baguette, sliced lengthwise
aged gouda or other strong cheese
1 Tbsp horseradish
butter
Oxtail has a ton of collagen--your liquid should now be a bowl of jello. Remove the tallow (beef fat) and reserve for another use (this a super-stable natural fat--go fry/sear stuff in it!).
Chunk out an approximate amount of the beefy gelatin into a small pot. Turn on the heat to simmer--it will turn back to liquid the moment it warms up. Reserve the rest of your gelatin for another use--further sandwiches, braising liquid, jus for another application, or freeze for fall soups! This is true stock at its best.
Keep the pot simmering until it reduces by about 3/4. You will be tempted to add salt at first. Do not; a reduction salts itself. This will take 20-30 minutes depending on your heat and volume of liquid.
While that's going, slice some nice thick pieces of gouda for one half of your baguette and butter the other half. You may definitely use another cheese here but it needs to be strong to stand up and be recognized among the beef and the horseradish. Throw these under a broiler to toast.
Nuke the beef to rewarm it (technical!). Shred with your fingers some if it still appears in larger chunks.
The buttered half will be done first--pull it out and smear with horseradish. Apply the warmed beef.
Pour your jus into a side dish so you can dunk the sandwich. Pull out your bubbly, cheesy sandwich top, assemble, and CHOW DOWN.
8.18.2013
A Traveling Crockpot Dinner
While this is my first formal post about it, the Traveling Crockpot has actually been in my life for some time now. A group of four gals get together once a month (mostly) where one of us hosts a dinner. Really, it's an excuse to find our fanciest recipes we've always wanted to try out but couldn't justify (or had time for) making on a Tuesday night after work.
My second Traveling Crockpot dinner was summer-themed (the first was a Middle Eastern Feastern!). Located here are my personal photos...which, as usual, kind of suck. But! Happily, our group includes Mrs. Becky whose talent populates Little Siddall Studios with much more pleasing visual fare.
To Drink
Mango Balsamic Spritzer with Mint
I'm not even going to try with a photo for this one; it was too lame. Check out Beck's.
Don't get weirded out about a drink with vinegar in it. It brings a totally unique brightness to the flavors. If you live in Toronto, you can get excellent mango balsamic at Crescendo (two locations).
This drink could probably use a high-ball glass. The structure is that of a mojito, but the two drinks share nothing else.
1 drink
1 tsp mango balsamic vinegar
2 sprigs mint
1 oz orange liqueur
3/4 oz vodka
Crushed ice
gingerale
Strip the mint and muddle the leaves with the vinegar in a cocktail shaker. You want a lot of mint; if your sprigs look measly, don't shy away from adding more.
Top with enough crushed ice to fill your glass. Add the orange liqueur and vodka (go for the good stuff! I used Patron's orange liqueur and Grey Goose vodka). Shake, and pour ice and all into the glass. Top with gingerale to fill the cup.
To Start
Scallop-Mango Ceviche
Again, "real" photo here.
The ceviche was a big guessing game. I googled a half a hundred recipes and cobbled together my own. Use more mango than you think, make sure the scallops are bite size (I should've trimmed down even my bays), and toss in acid briefly. All those recipes recommending 4-8 hrs are going to turn your scallops into rubber.
Main
Seared Pork Chop with Chipotle Butter and Avocado Mousse
Mango-Kholrabi-Radish Slaw
The chops are seared in a hot pan with butter and a little oil to keep it from burning too fast. Don't use a nice olive oil--use a grapeseed or something else with a high smoke point that will allow you to sear the chops super-hot each side for just a few minutes to get that golden-crisp exterior. A barbeque would be equally as awesome but I don't have access to one of those.
My chops were centre-cut, bone-in, local pork affairs purchased at the awesome Sanagan's in Toronto's Kensington Market. Leave the bone in--it helps with moisture retention and is quite easy to eat around with this cut.
Chipotle Butter**
1/4 lb butter, unsalted, softened
3 chipotles, seeded and minced
several dashes liquid smoke
honey, to taste
cracked black pepper
good, flaky salt, such as maldon or fleur de sel, to taste
The butter in this recipe is unsalted for two reasons. 1) You need control over the salt to get the right balance. 2) The texture of crispy flakes of good salt are wonderful.
Put the butter, chipotles and liquid smoke in a large bowl--you'll want room to whisk vigorously. Add approximately 2 Tbsp of honey, 1 Tbsp cracked black pepper and 3/4 Tbsp salt to start.
Whisk together all ingredients until smooth. This will take time to come together--it may seem like you'll whisk forever at first. Be patient.
Taste, add as needed, whisk. Taste, add as needed, whisk.
Avocado Mousse
1 avocado, very ripe
2.5 Tbsp heavy cream
juice of 1/4 of a lemon
You could make this mousse much more complicated. I had enough flavors on the plate with the coleslaw and the butter and I didn't want to take anything else away from those amazing porkchops. So this just became a fatty foil for heat and acid elsewhere on the plate.
Get the avocado into a bowl; doesn't matter how. Add the cream. Whip like the dickens. Again, this will take time to come together. Near the end, when it's almost perfectly smooth, add the lemon juice to keep it from browning.
Mango-Kholrabi-Radish Slaw
1 mango
1 kholrabi
5 radishes
acid
oil
1.5 tsp sugar
Matchstick the fruit and vegetables. The kholrabi tastes very much like cabbage. If you can't find one, actual cabbage would do; they're even the same color. I found pretty little Easter Egg radishes for the rest of the color in this dish.
Mix the acid (I used a calamansi vinegar from Crescendo(as mentioned above)) and the oil. Get creative here if you like--an avocado oil would be awesome, for instance. Or use lime juice if you have leftovers from the ceviche. I like a 2:3 acid to oil mix, personally, which may be a little heavy on the acid depending on your palette and what you're using. Taste and adjust as necessary. You'll need a little sugar but not too much--a nice ripe mango adds plenty here.
Dessert
Goat Cheese Pudding with Strawberry Rhubarb Compote
Another recipe not my own. While it's not photogenic, it's unbelievably good. The singularly excellent recipe is here at Food & Wine. I've made it twice, excellent results both times, but you must have some kind of acid (like the raspberries in their version) to cut this.
The compote was my own. You simmer strawberries and rhubarb and a bit of water and a bit of sugar together for a long time. I can't tell you anything more about that.
Bon appetite!
*I love the guys behind Real Food Has Curves which is sadly no longer updated. I'm just so glad they left the links live on this old version of the site. Their new materials exist here. Also, having the thyme added to the apricot soup was crucial, imo, though they list it as optional in the original recipe.
**This is
what's called a compound butter. You can basically take any
mash of flavors that appeal to you and use them in a compound butter.
Other suggestions would include rosemary, anchovies and garlic. Sage.
Lemon and thyme. Basil and black pepper. Roasted garlic and chili
flakes. You get the idea.
To
store excess (the recipe above provides plenty of excess), dob butter
in a log-ish shape on a length of plastic wrap. Use the plastic to make
a neat log, twist off the ends, and toss in the fridge. Lasts a good
long while.
Compound
butters can be used at room temperature, smeared on bread, dobbed on
meats, as the gloss-and-fat addition to a sauce, cold disks to melt over
your hot veg, as the fat to fry an egg in... The list is pretty
ridiculous.
Labels:
Alcohol,
appetizers,
Beverages,
mains,
pork,
salads,
sauces,
That Seems Like Work,
Traveling Crock Pot
7.06.2013
F-Word Salad
I've said before that I consider salad posts cheating. Most salads are creative fridge-dumps, folks scouring to do away with the ends of this and that.
This one was intentional, the result of an inspiring trip to the grocery store, but really, still cheating.
I've got a good-'en lined up, however, for later on. So if you can forgive me this salad, you'll be rewarded.
F-Word Salad
Proportions are largely up to you. Eyeball the salad and make yourself happy.
Frisee, torn up
Fennel, sliced very thin
Figs, quartered or even eighthed
Fresh basil, chiffonaded (about 2 Tbsp if you're going to make this an entree. Don't skimp.)
Fffffgoat cheese
Fava beans (optional)*
Date vinegar
oil
salt to taste
lots of pepper
Toss the frisee, scatter on top the fennel, fuss with the figs, chunk the cheese and sprinkle with basil.
Mix the vinegar, oil and salt to your taste. Drizzle. Crack lots of black pepper over top.
*Fava beans were part of the original recipe here. I wasn't as excited about them as I had been in the store, seeing the giant pods (you could use frozen, I suppose, but seeing fresh favas got me all a-twitter), but it wasn't a bad addition to the salad. My sister, on the other hand, liked them. So. *shrugs*
We served with peppery shrimp, a whack of bread for the sauce therein and a pseudogarita.
4.23.2013
Seafood soup
I am pleased to announce that I'm getting good enough with my cooking to ad-lib a fair number of dishes. For instance, the braise holds no fear for me. The sear is my friend. If I read several renditions of a single recipe, I can usually fake it pretty well directly after.
So, inspired by various turns on cioppino, I decided to tackle a seafood soup of sorts.
The name still bothers me, I admit. Not appetizing at all. So try not to read the title and keep looking at that photo instead.
4 Tbsp butter
1 shallot, minced
2 cloves garlic, minced
1 cup fennel, diced
1/2 Tbsp sweet paprika
salt and pepper to taste
2 cups fish stock
1 Tbsp tomato paste
glug white wine
1 cup bell pepper, diced
1 jalapeno, minced
1/4 lb 30-40 shrimp, shelled
1 fillet barramudi, diced to approx. bay scallop size
1/2 lb bay scallops
2.5 lbs mussels, cleaned
parsley, for garnish
Add butter to pan, gently softening shallot, garlic and fennel for a few minutes. Add paprika and seasonings, stirring another minute until fragrant.
Add stock and remaining ingredients, minus mussels and parsley. Cook at a gentle simmer for 4 minutes. Add mussels, cover and cook for another six minutes.
Discard mussels that do not open and distribute soup to plates, garnishing with parsley.
Serve with crusty bread (covered in garlic?!) for sopping.
9.11.2011
Stocks

I love fall. More, I love cooking in fall. It feels like my element. I can roast poultry and vegetables and make hot bean soups. I think I'm able to throw together some chop for a salad fairly well, but it's not the same as having a steaming bowl or plate of warm waiting for you at the table.
On that note, I've branched out in the world of stocks; I made a seafood stock. I'm not going to give you the recipe for it. Stock recipes, to my mind, are counter-productive. For one thing, you can throw just about anything in a stock pot and it fits the bill, including apple or pear peels if you were feeling ambitious enough. What I will talk about are some basic ingredients for a stock and what you might desire to get the general flavor. You should always, however, branch out. I threw a whack of diced fennel into my seafood stock, for instance, because it had tasted damn good with the mussels I'd eaten originally. Keep in mind, too, that stocks and broths are not just for soups! Add them to rice, a casserole or use to poach instead of water.
A note--I will not mention bay leaves, salt or pepper below. They should probably be added to all of them. (A note on pepper, though: Add whole peppercorns rather than cracked pepper or ground pepper. Unless you want to strain your stock with a coffee filter, too much of that pepper will stay behind.)
Technique:
A brief thought on how. Old-school stock making is slightly more time-consuming when you have to dip and scoop foam off the top of the pot all the time. If you have a slow cooker you can literally dump ingredients and forget about them forever. Whatever you're cooking will only get better and if you want to get rid of fats from meat stocks, skim the fat off the top once it's cold and solid, if you must. Otherwise, fats provide a nice protective layer over the rest of your stock.
Vegetable:
I would encourage you to save all your vegetable scraps for vegetable stock. Not even just for vegetable--save it all for any stock! I recently purchased a whole chicken and after eating the breasts, the bones went in the pot and the dark meat was torn up to go into pot pies. Everything but the skin off the back half of the chicken was used and reused--feels good! Onion and garlic skins and everything can be saved.
Now, I have heard people classify vegetable stocks into light and dark...
(Which, by the way, I should be calling broths. Small tidbit that I wasn't aware of until last year: Stocks are the ones that go gelatinous when they're cold. Their jello-ness comes from the fact that there was bones or joints or some other such in the pot. If you haven't been able to get to the gelatinous stage, some people suggest cracking small bones open or adding chickens' feet to the pot. Personally I couldn't be bothered and mine always come out fine. Stocks supposedly contain more nutrition, though I fail to see how pure vegetable stocks (sorry, 'broths') would not be nutritious seeing as you've boiled up a bunch of veggies. Anywho. I'm no scientist, I suppose. Broths are the ones that are lighter, thinner, free of gelatin and supposedly less nutritious. I might be missing some definitive markers in here, but that's the gist of it.)
Light stocks might include things such as onions, garlic, bits of fruit, carrots, mushrooms, celery, etc.
Dark stocks might include heavier vegetables such as portabellos, turnips, etc. Dark stocks would also benefit from your roasting the vegetables before you boil them to death. Enriches the whole thing.
One thing to avoid may be cabbages. I've never tried them myself as I've heard they have a rather overwhelming flavor and will take over a stock if given the chance. Personally? Unless I'm trying to recreate a vegetarian stock to sub for a beef stock as in when I try to make my sister French Onion Soup, I just mash it all together, roasted or not, 'dark' and 'light', and let it simmer a good long time. Or, now that I have my slow cooker, let it slow cook overnight, for instance.
Chicken:
I'm less variable with chicken stocks. Chicken is a primary, of course. Carrots, celery, onion, garlic. I'm actually a big fan of leeks rather than traditional onions in chicken stock. Have an idea for a spicy soup eventually? Throw in some whole dried chilies. Also, don't get rid of the "garbage" pieces! For instance, when I spatchcock a chicken, I save that backbone for the stock pot.
Beef:
Being that we almost never make red meat in this house, it's rather more difficult to tell you what to put in a beef stock. I would probably treat it the same way I treat pork stock. If I'm making pulled pork, I'll put the roast in the slow cooker, slice up an onion in large rings to dump over it and cover it all with water. Very basic, but a beautiful, rich stock at the end. Likewise, I've boiled hamhocks into times unknown with awesome results. Perhaps for a Split Pea Soup?
Seafood:
I'd never tried to make a seafood stock before. But after making two pounds of mussels it seemed to me a rather damn shame to just toss out all the scraps. In this case, my scraps were the emptied shells (a few with bits of meat still in there) and a few mussels that had been broken or already dead and open or what have you. I've been dreaming of a couple chowders I'd like to make and it seemed stupid to dump chicken stock into a chowder when I had all the fixings for a good seafood base. A caveat about using mussels, however: make sure your mussels (particularly the broken ones) are very, very clean. You may have to strain this one through a coffee filter anyway as it's rather difficult to be sure you've gotten all the grit out of a broken mussel. I had rope-cultivated mussels which were very clean to begin with so I was relatively safe. I've also done this with uncooked shrimp tails and fish scraps if I've trimmed down a fillet or some such.
I don't think you'll see many recipes for seafood broths anyway, but I threw all the mussels in there, onion, that fennel bulb, a few grape tomatoes that had nearly spoiled, garlic, some carrot tops... A lot of the usual basics for a stock, plus some thyme and parsley. Always add a spice you find familiar to the family of flavors you're building if you have it. Preferably whole, so you have less mishegas to strain out.
One last tip: In the case of stocks/broths I've done where the smell isn't quite right? Not deep or rich enough? I'll actually use that liquid as part of the covering liquid for another batch of broth/stock with, say, more chicken if they previous one hadn't quite smelled chicken-y enough. If the smell doesn't come through, the taste won't come through.
Any secret ingredients you really love in a stock?
7.03.2011
Project: Spicy Oil
Flavored oils are easily attained in your own kitchen. Try poaching a head of garlic in a giant pot of oil someday instead of roasting it in the oven. You'll get the same sweet, delicious garlic and a pot of garlic oil for bread-dipping to boot.
Flavored oils are attainable by hot or cold infusion. Hot infusion is the faster method: you do something like poaching garlic or hot peppers or (sturdy) herbs and then blend and strain the results. I adore this cold infusion method (which actually uses the heat of the sun), however, as you end up with a bottle full of pretty in addition to great food.
Oils aren't just for dipping. The obvious other choice is dressing--a friend used this oil and a maple balsamic to make a killer spicy-sweet vinaigrette. You can dress pasta as well as greens--mild cheese ravioli with a spicy drizzle can give a dish the life it needs. Use it in a stir-fry. Use it to enhance another sauce.
There's plenty to do and much to go around. I'm leaving a recipe for spicy oil here but you can easily take any combination that suits your fancy. Add citrus zest. Add the incredibly excessive numbers of flowers your basil plant insists on producing. Whatever. Just use more than you think you need! It'll reward you with a magnificent potency.
Of course, this is a project. I love kitchen projects, which, in my mind, are different than recipes. When you are bound to wait at least a few weeks for something to finally be ready, it's not a recipe. This oil, which I chose to do by cold infusion, is by necessity a project. Plus, it's beautiful, what with all the whole spices floating about inside the bottle.
Spicy Olive Oil
1 (500 ml) bottle oil
(Don't bother with the good stuff; the heat will override any natural flavor.)
7 or 8 whole, dried chilies
4 sprigs rosemary
3 clove garlic, smashed
3 tsp red pepper flakes
whole peppercorns
I prefer to work with a bottle I've emptied into another vessel, but at a minimum you should be displacing the top third of the liquid to ensure there's no overfill
Using a funnel, roll peppercorns into the bottle until you have approximately 3/4-1 inch settled at the bottom. Add red pepper flakes and garlic.
Bend the chilis a little to open up their oils and feed them into the bottle; don't damage these too much. They're part of the looking-pretty bit I mentioned earlier. Do the same with the rosemary, crushing the piney leaves a bit and breaking the stem in a couple of places to release their oil and scent.
Place the oil in a sunny window for at least a month, or more if you're feeling patient. Turn gently about once a week to evenly distribute the flavors.
Use to saute, dip bread, marinate, etc.
Note: You may want to select a light colored glass if your original bottle was not such so you can better enjoy the arrangement once it's sitting in your kitchen. Refrigeration will extend shelf life; the oil can last for months. It will appear cloudy in the fridge but will clear up at room temperature.
5.15.2011
Middle Eastern Feastern

Welp, I'm back on one of my Middle Eastern kicks. I thought I'd enjoy the journey with you and yours since I've been enjoying myself and am quite proud of the whole thing here to boot.
And, best of all, all of these recipes are available online for free due to the generosity and creativity of several geniuses listed below...
Now, I'll say first off that normally I'd make my own hummus. However, the store was out of tahini (or doesn't carry it anymore? I'd swear I've seen it there before). So, store-bought on that count. Otherwise, however, I'm partial to Mr. Smith's recipe, for the record. I just tend to up the garlic (yeah, because that's necessary, given the rest of this meal).
First up in actual cooking? The turnips. You should actually do these a few days in advance (not one day in advance, like me). They take a few days to get that excellent salt-vinegar tang to them. However, mine have finally achieved perfect color (get a big beet).

The recipe is in this thread, but I'm going to list it below as well in case Chowhound decides to archive their forums or some such.
Okay my recipe for pink turnip pickles is as follows
2 lbs of turnips
1 beet peeled and cut
3 1/2 cups of water
1/2 cup vinegar
2 Tbs salt
3/4 tsp of sugar
Chop vegetables into appropriately sized sticks. Mix liquids with seasonings until dissolved. Combine them, stir, leave covered approx five days. Once finished pickling, refrigerate.
The above makes an awful lot, so I've halved the liquids/salt/sugar and chopped up 2 turnips and a large beet to make the picture above.
Next up: Thoom (Garlic Sauce)

I'm going to tell you straight-up that I still haven't got the trick of this one. Basically, the idea is that if you emulsify enough oil with the garlic, you get this light, fluffy sauce. I've yet to get it as smooth or as creamy as other creators seem to and I've tried it a couple times. My only hints so far? Add oil very slowly and do not try this with a food processor. Too big.
In today's version, I tried this person's method after picking up and discarding several other recipes and websites. I haven't tried adding the egg white--that may be the next trick I give a shot. Also, while I'm going to tell you straight up that I used an immersion blender, you can also grind the garlic to a paste using a mortar and pestle and then emulsify with a whisk.
Next up: Tabouleh
I find tabouleh to be a critical part of my Middle Eastern Feastern because a) the parsley tone is critical, to my mind and b) tabouleh was one of the first Middle Eastern foods I ever fell in love with. Thank you, Mega Wraps Guy in conjunction with My Mom for getting me to try it all those years ago.

While the base is here, I've modified a bit in that picture. I knew I'd want some cucumber so that's in there; a little bit of garlic (a no-no in traditional circles); and I switched out the bulgur wheat entirely. I wanted some more protein, some more cals-per-bite since this is going to be my primary belly-stuffer. So, quinoa, that holy "complete food". I should add, however, that bulgur wheat does in fact have a good bit of protein in it and significantly less fat. I also just like quinoa and am trying to fill this sucker out.
Next up: Falafel
Here's where it gets ugly. Up until now, we've had thrilling colors, creamy consistencies, bright salads... Falafel is ugly. It crumbles, it's a funny shade of yellow-green and uncooked it's about as appetizing as any other mash.

For my first real homemade falafel (read, not out of a box mix falafel), I used the lovely Mrs. Charmian's recipe. I followed her lead and soaked some chickpeas overnight. This meant I ended up with fewer peas than I'd meant to (I get very loose with my dried bean measurements).
I also, see above, did not have the called-for tahini. So. Some adjustments.
Double the spices. I'm telling you that now. I like the combination, but my first few patties were not that flavorful. This is just too much chickpea to flavor with individual teaspoons. And add some cayenne. I also had some zata'ar on hand so I added a couple heaping teaspoons of that.
What did I do instead of tahini? I improvised. I dumped in nearly a quarter cup of sesame seeds and added olive oil as I went for texture. I think with the lack of tahini, my mix was overall dryer, so I was easier on the breadcrumbs in the final step as well.
Next up: Pitas
Well, we gotta have something to put all this stuff in, don't we? Enter the humble pita.

These bad boys are thrilling to make since, when you make them right, they're a little show in your oven as they puff.
Now, I don't care what measurements this man's website gives you about rolling. Make them as thin as possible. Thin, thin, thin! This gives you the best puff for your buck.
This recipe gave me pitas with fluff and absolutely fantastic pockets. They came open so easily it was ridiculous. Lastly, I made mine with 2 cups all purpose flour and 1 cup whole wheat flour for some additional texture.
And that, my friend, is a Middle Eastern Feastern, vegetarian style. I have some plans in the making for a chicken shwarma recipe of my very own, but you all will just have to wait until we've at least gotten past Meatless Monday. Jeez.
4.19.2011
Choc-a-block Chicken Soup
Mother Nature, if your intent with this wicked-bad non-spring-ish weather was to make me desire one last giant pot of soup, then you have succeeded. Frankly, if it wasn't, I don't know what the point is because I'm sure you don't like seeing us miserable. You wouldn't've made such fine and beautiful things come out later in spring if you liked miserable.
Or, and here's a theory, maybe you knew I had some cooked chicken meat that needed using up.

Chock-a-Block Chicken Soup
I cannot make a small soup. I am incapable. I thought, before starting this, "I'll just make enough for tonight, lunch tomorrow and maybe one more to freeze."
Hah. I should've never believed me.
This soup ends up being pretty thick with stuff (it's chock-a-block, duh), although I still wouldn't classify it as a stew--the broth's too thin, in my mind. As with all my soups, this one is a gigantaur. Feel free to adjust.
6.5 oz egg noodles (or 180 grams)
water
1 Tbsp oil
2 cups (1 large) leeks, thinly sliced
1 cup diced carrots
salt
5 cups broth
3 cups water
1 1/2 cup chopped, cooked chicken
2 cloves garlic, diced
1 medium zucchini, diced
5 mushrooms, quartered
1 cup frozen corn niblets
2 Tbsp fresh thyme, minced
1/2 Tbsp dried parsley
1 tsp red pepper flakes
salt & pepper
squeeze of lemon
Bring the water to a boil.
Meanwhile, heat the oil in a big ol' saucepot and add the leeks and the carrots. Salt them now, as it'll help them sweat a bit. I like leeks for a few reasons--they're mild, their smell evokes chicken soup to me like no other, and they're much prettier floating around in soup than their diced white counterparts. The measurement sounds like a lot. This was a big leek. Plus, they break apart and fluff the second you move those pretty rings. Stir occasionally over very low heat; the idea is not to brown, for once.
Stirred to softness? Good. Your water's probably boiled, so go dump the noodles in.
Add broth and water to your aromatics, then the chicken and garlic. Black pepper it. Stir, then bring this to a simmer for ten minutes or so.
Take your noodles out at about half that time, five minutes. They're a little al-dente at this stage but that's good--you'll cook them a little when they're added to the soup (don't add them straight in; you'll loose too much liquid) and probably cook them again when you rewarm the soup some later day.
Now that we've simmered, add the quick-cooking vegetables and the herbs: the zucchini, mushrooms, frozen corn, thyme, parsley (note fresh vs. dried amts!), red pepper flakes, and that squeeze of lemon. Fear not--the red pepper flakes are not enough to make a vat of soup this size truly spicy. Rather, they lend warmth. But you're gonna reduce them anyway, so whatever, go ahead.
Squeeze a wedge of lemon in. No, seriously. It'll be nice. I'm debating just adding some of my minced preserved lemons next time.
Add the noodles. Stir, let this all simmer five minutes more.
Serve with some sort of bread.
Or, and here's a theory, maybe you knew I had some cooked chicken meat that needed using up.

Chock-a-Block Chicken Soup
I cannot make a small soup. I am incapable. I thought, before starting this, "I'll just make enough for tonight, lunch tomorrow and maybe one more to freeze."
Hah. I should've never believed me.
This soup ends up being pretty thick with stuff (it's chock-a-block, duh), although I still wouldn't classify it as a stew--the broth's too thin, in my mind. As with all my soups, this one is a gigantaur. Feel free to adjust.
6.5 oz egg noodles (or 180 grams)
water
1 Tbsp oil
2 cups (1 large) leeks, thinly sliced
1 cup diced carrots
salt
5 cups broth
3 cups water
1 1/2 cup chopped, cooked chicken
2 cloves garlic, diced
1 medium zucchini, diced
5 mushrooms, quartered
1 cup frozen corn niblets
2 Tbsp fresh thyme, minced
1/2 Tbsp dried parsley
1 tsp red pepper flakes
salt & pepper
squeeze of lemon
Bring the water to a boil.
Meanwhile, heat the oil in a big ol' saucepot and add the leeks and the carrots. Salt them now, as it'll help them sweat a bit. I like leeks for a few reasons--they're mild, their smell evokes chicken soup to me like no other, and they're much prettier floating around in soup than their diced white counterparts. The measurement sounds like a lot. This was a big leek. Plus, they break apart and fluff the second you move those pretty rings. Stir occasionally over very low heat; the idea is not to brown, for once.
Stirred to softness? Good. Your water's probably boiled, so go dump the noodles in.
Add broth and water to your aromatics, then the chicken and garlic. Black pepper it. Stir, then bring this to a simmer for ten minutes or so.
Take your noodles out at about half that time, five minutes. They're a little al-dente at this stage but that's good--you'll cook them a little when they're added to the soup (don't add them straight in; you'll loose too much liquid) and probably cook them again when you rewarm the soup some later day.
Now that we've simmered, add the quick-cooking vegetables and the herbs: the zucchini, mushrooms, frozen corn, thyme, parsley (note fresh vs. dried amts!), red pepper flakes, and that squeeze of lemon. Fear not--the red pepper flakes are not enough to make a vat of soup this size truly spicy. Rather, they lend warmth. But you're gonna reduce them anyway, so whatever, go ahead.
Squeeze a wedge of lemon in. No, seriously. It'll be nice. I'm debating just adding some of my minced preserved lemons next time.
Add the noodles. Stir, let this all simmer five minutes more.
Serve with some sort of bread.
3.24.2011
Decadence

Remember how I said I'm not lavish?
I said nothing at all about decadence.
My favorite thing about having guests over is cooking for them. Therefore, when two of our very good friends came over, I broke out all the stops for dessert.
I chose cheesecake, obviously because I'd never made it before and I was trying to impress people. Sounds logical, right?
Let me repeat something: I'd never made cheesecake before. And yes, this recipe is mine. I have discovered a so-far well-tested procedure for new recipes and thus far, it's working out pretty well. There is also the added benefit of being able to tell you what I screwed up because, as a first-timer, my mistakes were visceral and obvious.
For one thing, I started too late. The above picture was taken before the cake had properly set, accounting for it's slightly gooey appearance. But dinner was done and I wanted to try it so bad. (For the record, taste is unaffected at this point, but the finished texture of cheesecake is more appealing to me.)
Before we begin, I'd like to tell you about Christie's Corner in brief. That link will take you straight to her no-crack-cheesecake bible page, which I also studied extensively before undertaking this work. Christie, a fellow Cana-jun, eh, appears to be a fabulously lovely lady who runs a great food blog. Proof: My cake did not crack. She does a whole lot better than that, even, but that's for another post.
Chocolate Cheesecake with Decadent Accents
I'm going to be honest and tell you this should probably be a two day project of yours. The toppings are enough work for one day and the cake itself for another. It also feels like less of a crush this way. And trust me. This is so worth it.
You do, of course, have the option of not following the recipe and making your life a little easier by omitting complicated sauces and toppings and just getting to the damn cake. Just a thought. I won't be mad.
Crust
1 1/4 cup graham crumbs
1/4 cup sugar
1/4 unsalted butter, melted
Layer
4 oz dark chocolate
Filling
3 (250g or 8 oz) pkgs cream cheese
3/4 cup sugar
2 cups semi-sweet chocolate, melted
1/2 cup sour cream
1/2 cup milk
2 tsp extra-strong instant coffee*
1 tsp vanilla
For the crust, pour the graham and the sugar into a bowl and mix. Melt the butter and pour over the graham. Mix some more. Grease the pan, add your parchment paper layer at the bottom if you're going to, and then pack the graham into an even layer on the bottom of a 9" spring form pan. I left this in the fridge to give it some solidity while I was making the next layer.

For the filling, melt the chocolate. Go long and slow with it in a double-boiler. That sounds fancy. I melted this in a cheap, metal bowl sitting in the mouth of a just-simmering pot of water. Don't actually allow the bowl to get immersed in the water--good way to burn the chocolate. In my case, it probably took longer because my pieces were perhaps larger than some. I hate chopping chocolate--it's messy and flies everywhere and smears into things you didn't even think it was near. But I wanted that "snap" layer Christie's page mentioned, so goddamnit, I chopped chocolate. I then spread that over the graham layer as quickly as possible--it moves best when hot and you just poured it onto a cool if not cold surface. Try to make this a THIN layer--think about cutting a slice of cake through that solidified chocolate.
Throw these two layers in the fridge while you make the filling.
We're down to filling, people. This is an exciting moment. For some of you, this is the only moment, and I don't blame you a damn bit. I would've eaten this stuff out of the bowl. Happily.
Leave the cream cheese out a good long while. It needs to be room temperature if not warm to beat properly. Otherwise you do get little dots of unmixed cheese in your filling. I did, in fact. And I left those bricks out for hours. I'll flat-out warm them a touch next time.
Full disclosure: I beat this with a stand mixer. You can totally do it with the power of thine arm, though. It's just going to take longer.
Beat together the cream cheese and the sugar, starting with one chopped block of cheese and adding the rest gradually.
Add the second batch of melted chocolate. This is a labor of love. It takes a long time to melt this much chocolate. Read a book while you idly stir.
Slowly, gently, beat in the sour cream and the rest of the liquid ingredients. I believe that the science says that if you beat rapidly and fiercely, you'll add air to the batter and artificially inflate the cake. It's a heavy cake; it'll fall on itself when it cools and you'll be sad.
Pour that filling into the pan. Bake for approximately an hour at 300 degrees. Slow and steady.
I used the bain marie technique, and as I say, no cracks. It was a little fussy, though. I will probably try without next time, just to see.
Give it an hour or so to cool outside the bath once it's done baking. Then throw it in the fridge for at least four hours, preferably overnight.
Pomegrante Puree

Look at that colour!
I fixed this portion of the dessert up before the cake was a figment of my imagination. Originally, I intended for it to be a substitute for pomegranate molasses in one of Mrs. Rule's vinaigrettes but after tasting it, decided it should be an addition to, oh, just about everything.
2 cup pomegranate arils
1/2 cup water
2 Tbsp maple syrup
Throw arils (I found a regular-size pomegranate to be about 2 cup's worth) and water into a small pot. Bring to a boil and then reduce to simmer, covered, for about fifteen minutes.
Throw the contents of the pot into a blender. Blend until arils are pulverized, but do not expect a puree at this point. The seeds at the heart of the aril will studiously avoid your blender's blades. Pour the pomegranate back into the pot through a metal sieve. It's helpful to use a flexible spatula to mash the remaining seeds back and forth, scraping the bottom of the sieve to preserve as much of the aril's pureed flesh and juice as possible. Discard seeds.
Add maple syrup to the pot and stir well. Bring the mixture back to a simmer. Allow to simmer covered for five minutes to make sure the syrup and fruit is blended, then remove cover and reduce for approximately twenty minutes to half an hour, depending on your desired consistency. Remember the puree will thicken as it cools as well.
So, you're done? I congratulate you. I will tell you what I did to plate it, then. Though, I'll warn you, I'm no expert and it probably could have been presented much more beautifully.
I knew this would be heavy so I used the sauces (yes, multiple, as you'll see in a moment) as something to relieve the palette. Firstly, I poured a pool of the pomegranate puree beneath the cake. I set a slice of the cake down right in the middle of it. Then I drew an arc of creme anglais
around the side of the plate. I set a couple of mint leaves into the cream for color and a little infusion, if they sat there long enough. Then I pressed a finger-full of slivered almonds into the top of the slice for a peak.
And...there you have it. An absurdly decadent, ridiculously time-consuming chocolate cheesecake that will make you close your eyes and press your tongue through the chocolate just to feel it.
*Extra-Strong Instant Cofffe
2 1/2 Tbsp hot water
1/2 tsp instant coffee
Love a little coffee spark in my chocolate. Mix ingredients.
2.27.2011
Apolopeas and Ham for Radio Silence
Now, I didn't figure this was going to be the active-est of blogs, but I didn't expect myself to tumble into THIS kind of silence. Oopie.
As penance, I hand you probably my favorite soup, during one of your last chances to make those really long-cook winter meals.
I give you, my Split Pea and Ham Soup.
Or as it is now known, my Apolopeas and Ham Soup.
My husband does not share my adoration for beans and lentils and peas, and I won't tell you what he thinks they look like cooked, so this recipe is for me alone. This means that I have made an enormous vat of soup all for myself. Luckily, soup always freezes. Now, I've never made split pea soup until now as most every recipe I've come across requests that I use a ham hock for flavor and meat. I had yet to ever see something in the grocery store which called itself a ham hock and therefore I never made it, feeling that boiling a hunk of cooked, smoked ham would be somehow inadequate.
(Though, now having made pea/bean soup with both a ham hock and a hunk of cooked ham, I can tell you that the hock does lend a certain smoky flavor and the shredded, unprocessed meat gives the soup a far more traditional mouth feel. A rustic feel, you might say. I think it’s lovely, but the more processed, pre-cooked hams are not awful by a long shot.)
So I pined after the perfect split-pea concoction from a can for years, never finding it, and wishing, strangely, that Tim Horton's would just sell me theirs. (I'm a salt junkie; I'm sorry.)
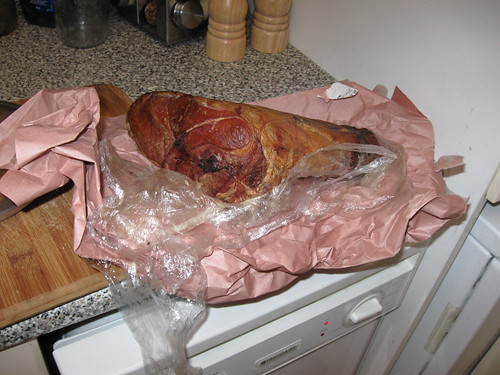
A few days after we moved to our new home in Toronto, I went visiting the Culinarium. Amongst their gorgeous products (and produce), I saw, in the bottom right corner of a freezer, a triangular shape wrapped in butcher's paper labeled 'ham hock'. I knew, immediately, what I had to do.

Now, I need to explain to you that I bought this enormous hunk of meat without thinking about any recipe. When I got it home and realized I'd purchased a 3 1/2 pound hock and that it was too big to even fully fit in my soup pot, I was a little daunted. That said, I managed, and I will tell you just how so based on my experience. But I might recommend you look at getting a bigger pot or a smaller piece of meat. As it is, I have a bunch of leftover meat and four cups of beautiful, rich ham stock.
So, without further ado...
Split Pea Soup with Ham
Now, you are being warned--this is one of those recipes that I did not measure as I went. I am guesstimating the amounts I think I used here. If something looks wrong to you, adjust as necessary.
This is a half-day recipe for sure, if not longer, depending on your belly's noise levels. It is, however, a half-day recipe that doesn't need a lot of tending, so you can probably do as I did and get on with household chores in the mean time.
3 1/2 lbs ham hock
2 cups split green peas
3 smallish carrots
1/2 large onion
3 cloves garlic
1 tbsp unsalted butter
3 bay leaves
splash of liquid smoke
ham stock
water
salt and pepper to taste
In the morning, start your stock. My hock stood up out of the pot by a few inches so I filled it with as much water as I dared and got it bubbling. Top off the water every couple of hours if necessary to get as much of the hock submerged as possible. Eventually, the meat at the bottom softens and you can push the whole thing down a little more (I never quite got the whole thing in, however). Let it simmer away, skimming occasionally, for approximately three hours or more. Remove hock from the stock and let it cool. Pour out the liquid into a separate container and reserve.
When the hock has cooled enough to handle, pull off and dice up 1 1/4 cups of meat. Reserve the rest of the meat for another use.
Dice the carrots, onion and garlic. Sautee in the butter for five minutes to soften. Please note I specify unsalted butter. The ham is already plenty salty. You probably don’t really need to add to it, and this is coming from a salt addict. Dump the rinsed split peas into the pot, the meat, the bay leaves and the smoke.
Pour in four and a half cups of stock and four cups of water. Stir everything up, cracking pepper over the whole lot. Resist adding salt until near the end so you can get an idea of how much the stock has flavored things. Bring to a boil and then reduce to simmer for approximately an hour or more, or until the peas have cooked and disintegrated to your desired consistency (I prefer the whole thing to be very soft and not highly textured, so I cook it for a long time).
This soup will thicken again as it cools; add water back in as necessary.
And, as always, the really awful picture to go with it.

(Do you like my staging? How I didn't even think to try to get this oozing green mash out of the messy pot?)
12.07.2010
A Salad Riffing Freshly
First, this was going to be a post about challah, which seemed timely, but since I haven't posted in ages, posting just a link (it's not my recipe) after all this time didn't seem right.
Then I was going to start it with, "Chicken breasts are difficult."
What I've decided on, after some thought, is to open by excusing my posting a salad recipe. See, I always feel like salad recipes are a little bit of a cop-out unless they're somehow unusual or a great break from tradition. Salads, much like soups, are a conglomerate of the stuff you have in your fridge and therefore have always been done before. I'm familiar with this sensation, however. As a writer, anything I put to paper has probably been done before; it's an on-going struggle. The result is, however, that I also feel somewhat secure in my ability to recognize a fresh riff.
I believe my salad riffs freshly.
Cajun Chicken and Mandarin Orange Salad
This salad contains a few extra steps beyond bowl, lettuce, dressing, fork. You could probably dump one or two if you really wanted to.
Second note--I used romaine hearts here. You could use whatever greenery pleases you because I'm of the feeling that lettuce is largely interchangeable unless you're looking for a very particular texture or flavor. In this case, the lettuce is just dressing vehicle. Use whatever you've got.
Lastly, I was originally going to measure ingredients for you. Then I decided against it. Much of this salad's beauty is its well-sprinkled toppings. Sprinkle as you see fit.
Serves twoish, depending on appetite
1 romaine heart, torn up
1/2 fennel bulb, sliced
2 chicken breasts
2 tsp Cajun spice (like this one?)
1/2 Tbsp butter
1 tsp olive oil
mandarin oranges
toasted walnuts (To toast a nut: Set oven to 425. Spread nuts in single layer over cookie sheet. Bake for 5 minutes, stir, bake five minutes more or until fragrant and browning.)
asiago cheese, shaved
2 Tbsp avocado oil
2 tsp white wine vinegar
salt & pepper to taste
Toss romain into a bowl. Top with fennel, sliced into matchsticks or rings or what have you.
For the chicken, mix butter and olive oil in a pan and add the chicken. Toss to coat. Sprinkle with the spice and sautee until chicken is crispy and browning all over.
Drop chicken on top of salad. Scatter oranges, walnuts and cheese over top. (Toasting the walnuts is one of those steps you could skip if you must.)
For the vineagarette, I chose avocado oil because I wanted something fruity to go with the oranges. You could do olive oil or walnut oil for that matter, though I think the walnut oil might OD the salad on walnut. Maybe you'd like that. Whisk the oil, vinegar and salt and pepper together. Drizzle over salad.
I vote a winner. I may be biased.
PS - Crappy photograph to come.
11.25.2010
Lunch
I think my sister thinks I'm lavish.
It's simply not true. I enjoy good food as much as the next girl, but I don't usually go crazy. That's saved for guests. (Hint--There may be a post for this Friday's dessert, for instance.)
In this case, her feelings are guided by misunderstanding. I say her feelings, but I'm making assumptions here--this is an educated guess of mine based on the fact that she thinks I make fancy, over-priced apps as snack food. The issue is, I don't think most people know how simple really good food can be.
Which is why I love the following recipe, which is less a recipe and more a series of steps you can fill out, because it feels indulgent. And, you will learn, I really like indulging. The only thing that will suck is waiting an hour while the smell of roasting garlic invades your house.
Prosciutto, Roasted Garlic and Goat Cheese Crostini
makes 12 crostini
1 head garlic, roasted*
1/2 cup goat cheese
4 large slices prosciutto
baguette, cut into 12 thin rounds
spicy oil, optional
minced fresh chives, optional
Note: This recipe has been updated since the original posting. Not only does it have a photo, the directions have changed a tich. I thought I was being fancy by layering prosciutto in thinner cuts previously. I've decided this is unnecessary because the little "blankets" scrunny up like the picture above displays. Simpler, faster, equally pretty and delicious.
Start your broiler heating. My gas oven allows me to set my broiler to "low".
Working over a cookie sheet, scoop out a clove with a butter knife and smear it over a round of baguette. If you have particularly large cloves, cut them in half. Top with crumbled goat cheese, dividing evenly between the rounds.
If you want a little spice, this would be the time to lightly shake some hot oil over the crostini. A pinch of red pepper flakes will work well too, but be sure your guests want that kind of thing!
Lay the prosciutto slices directly on top of each other. With a flat, sharp knife, cut into thirds, width-wise. This supposes you will end up with small slices that are just big enough to cover one of your crostini. If your slices are larger or smaller (I've gotten up to 4 pieces out of really big prosciutto slices), adjust accordingly. Layer prosciutto like a little blanket over the cheese.
Place cookie sheet in the oven 3-4 inches away from the broiler. Cook them for just 3-5 minutes or until the edges of the crostini and meat are browning; the fat at the edges of the prosciutto should be starting to crisp and render.
Consume immediately, guiltlessly, lavishly.
*Roasting a head of garlic: You do this by cutting the top 1/3 of the head off (you're aiming to expose the tops of most, if not all, of the cloves) and drizzling a little olive oil on it. You could top with a little salt and pepper if you want. I don't really see a need, though. Wrap it up in tin foil, set it in a 375 degree oven. Check it after 45 minutes. (One hour for two heads, which I would recommend, because who wants to turn on the oven for an hour for one bloody head of garlic? They will also keep in the fridge for a while so no panic.) The garlic is done when the tops are geennntly caramelizing (you don't need a deep brown like most "real" caramelizing - the outside cloves may burn first). You should be able to feel the garlic is smooshy-soft through the skin.
Seriously, that's all there is to this five-dollar app they've served you at a restaurant. A ten-cent head of garlic and time.
(Alternatively, you could get a similar flavor poaching a head of garlic and get yourself some garlic-oil for bread dipping and dressings and what have you at the same time.)
Achievement Unlocked: Roasted Garlic
11.15.2010
Recommendation RRrrrrrrondays!
Okay, so there will never be a good day of the week to note a recommendation and make an alliteration of said note. I'm okay with that. Mostly.
I anticipated from the start that I would intersperse recommendations with my own recipe posts as a tribute to those bloggers and inventors who have inspired me. So see the Recommendations page for the list of linking posts I throw up here.
The first linkee of honour that I wanted to have here was one Cheryl Rule. Cheryl runs 5 Second Rule, a hilarious, smart, fun blog that I can't say enough good about. She was also the one who inadvertently introduced me to the world of food blogging. I don't remember what I'd been looking for, but long ago, I found her via Google and after reading about a million recipes straight (and totally just for her recipe introductions--I'd stopped caring about the food three posts in, but it's awesome too), I knew I was hooked.
I'd like you to take a look at a simple offering of hers, Bacon Green Beans with Crispy Sage. This recipe combines two of the best things in the world, bacon and fresh sage, so you can't go wrong.
I anticipated from the start that I would intersperse recommendations with my own recipe posts as a tribute to those bloggers and inventors who have inspired me. So see the Recommendations page for the list of linking posts I throw up here.
The first linkee of honour that I wanted to have here was one Cheryl Rule. Cheryl runs 5 Second Rule, a hilarious, smart, fun blog that I can't say enough good about. She was also the one who inadvertently introduced me to the world of food blogging. I don't remember what I'd been looking for, but long ago, I found her via Google and after reading about a million recipes straight (and totally just for her recipe introductions--I'd stopped caring about the food three posts in, but it's awesome too), I knew I was hooked.
I'd like you to take a look at a simple offering of hers, Bacon Green Beans with Crispy Sage. This recipe combines two of the best things in the world, bacon and fresh sage, so you can't go wrong.
11.11.2010
Chai Tea Concentrate
For my very first recipe, foodie to foodie, I give you...
A drink.*

I was a huge fan of going out for drinks at a coffee house until I figured out how to make most of the drinks I like at home. Don't get me wrong--I don't have an espresso maker so lattes and foamed milk are out. But I never used to order those as a first choice anyway. What I did used to order, I now see as a waste. Why pay four bucks for that when I could do it at home? So I order some kind of latte and I enjoy it but I'm not possessed by its deliciousness.
My favorite has always--before and since the advent of my mild lactose intolerance--always been chai. Eventually, my mom and I scoured the internet for a recipe and I don't know if we were simple or the internet was simpler (but I have my guesses), but we didn't have a ton of luck. One recipe we did find called for peppercorns. Peppercorns? That just sounded too weird to us and we continued to satisfy our cravings by the overpriced cup.
It's only been in the last two years that I've figured out how to make my own chai. I like to use whole spices. It's a pain to go to a bulk store and find them sometimes, I know. However, it's easier, to my mind, to have a stock of these rather than carefully straining out your tea through a coffee filter so you don't have a quarter inch of grit at the bottom of your cup.
That being said, if you'd like to do it that way, go nuts. Just be careful with your translations of whole spices to ground.
Chai Tea Concentrate
Please note that this is a recipe for a concentrate, not a tea. Mix the results of this concentrate half and half or 3/4 concentrate to 1/4 milk, depending on your taste.
4 cups water
5 orange pekoe tea bags (I split these between caffeinated and decaf so I don't go to bed jittering)
1/2 cup honey
4 half-size cinnamon sticks or 2 regular size
15 cloves
8-10 peppercorns
5 cardamom pods
4 allspice berries
1/2 inch ginger root, smashed
2 medium pieces star anise
1 tsp vanilla
Bring your water to a boil and then add the tea bags. Turn the heat way down and allow the bags to steep for approximately five minutes. Bring the tea back to a boil and then add the honey. This will dampen your boil so get it going again.
Add the spices and the vanilla. Cover and reduce to simmer. Let the mixture simmer for five minutes with the tea bags, then remove them so the irony tea taste doesn't overwhelm the pot. Allow the spice to continue to simmer for the next twenty minutes or so. Strain out the spices. Serve hot or cold.
*I find two things hysterical about this photo. One, that the ingredients shown are not even, in fact, the ingredients I use as the nutmeg shouldn't be in there. When I took this picture long ago, though, I was. Too bad, so sad.
Two, I told you I was a shitty photographer. Only a photographer of my epic levels of mindlessness would frame their shot beside their dirty kitchen sink. I want you to know I photoshopped that picture, badly, to clean the sink up a bit. You're welcome.
A drink.*

I was a huge fan of going out for drinks at a coffee house until I figured out how to make most of the drinks I like at home. Don't get me wrong--I don't have an espresso maker so lattes and foamed milk are out. But I never used to order those as a first choice anyway. What I did used to order, I now see as a waste. Why pay four bucks for that when I could do it at home? So I order some kind of latte and I enjoy it but I'm not possessed by its deliciousness.
My favorite has always--before and since the advent of my mild lactose intolerance--always been chai. Eventually, my mom and I scoured the internet for a recipe and I don't know if we were simple or the internet was simpler (but I have my guesses), but we didn't have a ton of luck. One recipe we did find called for peppercorns. Peppercorns? That just sounded too weird to us and we continued to satisfy our cravings by the overpriced cup.
It's only been in the last two years that I've figured out how to make my own chai. I like to use whole spices. It's a pain to go to a bulk store and find them sometimes, I know. However, it's easier, to my mind, to have a stock of these rather than carefully straining out your tea through a coffee filter so you don't have a quarter inch of grit at the bottom of your cup.
That being said, if you'd like to do it that way, go nuts. Just be careful with your translations of whole spices to ground.
Chai Tea Concentrate
Please note that this is a recipe for a concentrate, not a tea. Mix the results of this concentrate half and half or 3/4 concentrate to 1/4 milk, depending on your taste.
4 cups water
5 orange pekoe tea bags (I split these between caffeinated and decaf so I don't go to bed jittering)
1/2 cup honey
4 half-size cinnamon sticks or 2 regular size
15 cloves
8-10 peppercorns
5 cardamom pods
4 allspice berries
1/2 inch ginger root, smashed
2 medium pieces star anise
1 tsp vanilla
Bring your water to a boil and then add the tea bags. Turn the heat way down and allow the bags to steep for approximately five minutes. Bring the tea back to a boil and then add the honey. This will dampen your boil so get it going again.
Add the spices and the vanilla. Cover and reduce to simmer. Let the mixture simmer for five minutes with the tea bags, then remove them so the irony tea taste doesn't overwhelm the pot. Allow the spice to continue to simmer for the next twenty minutes or so. Strain out the spices. Serve hot or cold.
*I find two things hysterical about this photo. One, that the ingredients shown are not even, in fact, the ingredients I use as the nutmeg shouldn't be in there. When I took this picture long ago, though, I was. Too bad, so sad.
Two, I told you I was a shitty photographer. Only a photographer of my epic levels of mindlessness would frame their shot beside their dirty kitchen sink. I want you to know I photoshopped that picture, badly, to clean the sink up a bit. You're welcome.
10.20.2010
Introducing, The Facts of Life
Hi. Welcome to my "new" blog!
New is in quotes for a reason. I've been blogging since 2005; somehow--and this is going to blow your mind so get ready--somewhere along the way prattling about my life got old. So this blog has waddled along toward its inevitable deletion for a few years now. Yet, I never quite got around to it. Then I got a new idea.
This blog has been polished, primped and prepped in anticipation of its reopening. It has been made faster, stronger...tastier?
It has become a food blog.
You're flabbergasted by my originality, I know, but please hold all applause for the end.
You see, I've had a burgeoning interest in cooking, baking and food for some time now. I've been taking pictures like a good little foodie (even though I am no photographer), reading other blogs, putting new cook books on my Amazon Wish List and feeding my husband all kinds of things he doesn't actually like. Then a few months ago, when I'd quit my day job in anticipation of a move, someone asked me what I'd do in the interim.
"Write," I answered. For some reason I assumed everyone in the office knew that I was a novelist, albeit an unpublished one.
"Oh!" they cooed. "A cookbook?"
(Through my Facebook updates, my meals had acquired some degree of status around the office.)
No, I thought, but not a bad idea.
While this is no cookbook, I felt it was time for me to start to share my ideas with the world. That's what I like best about writing--the sharing. Food is just one more good excuse.
I want to meditate a little on what this blog will be, then, and give you a feel for what I'm about.
This blog's meals will be cooked in a small space. This is a big part of the point of this blog. For the next few years, at least, I am damned to an apartment's kitchen that I can't, due to the fact that I don't actually own the space, change much about. I have very limited storage, limited counters and a fridge door which falls off (Landlord is STILL swearing he will fix it soon). None of this, however, is a deterrent to the determined!
This blog's meals will be small. I cook largely for my husband and I; there are no children and the cats sniff a lot but don't eat much. The single exception is my soups. I am incapable of making less than eighteen batches of soup.
This blog's meals can be made by hand. What I mean is, I will very rarely write about something that you can't do with a spoon, a whisk, a spatula and a metal bowl. While I've acquired things like stand mixers and food processors in the last year that make my life a lot easier, I have whisked meringue by hand. I (prefer to) make bread by hand. I anticipate someday making my first batch of ice cream this way as well. "By hand" can be slow, it certainly requires more effort, but if you really want to, you can do it.
This blog's meals will be made from scratch. I am actually famously bad at preparing pre-packaged products. I have turned rice into mush and Betty Crocker cakes into bricks. However, what this also means is that I advocate the whole-food, home-made movements going on. I am currently making an effort to know exactly what's in my food. I am steeping my own vanilla, brewing my own tea and preserving my own lemons. These things, you will find, are ridiculously easy.
This blog will talk about reusing. I am married to a man who more or less taught me to care about recycling. This attitude has changed me and my habits. Plus, the city of Toronto is aiming to force people into reducing their weekly garbage by accommodating a huge amount of recycling and green bin refuse. I appreciate the effort. Vegetable peels, ends and brown bits? Keep them for the stock pot.
This blog will take short cuts. Please forgive me. Sometimes I am just tired. Sometimes we will just order pizza. Sometimes I'd rather grab a damn high-sodium can of beans than cook some for two hours because I forgot to soak them overnight. I'm not a purist.
Settled? Good, then. Some things I won't do.
This blog will not be political. I enjoy reading other foodie bloggers' takes on the last Pollan article, the revelation of this or that practice, the reason for eating from a CSA rather than a Sobey's. While I have my own set of principles that will become clearer with time, I do not enjoy hashing such things out, particularly.
This blog will not be exact. You can blame me, here. I do not, for the most part, measure as I cook if I'm not using someone else's recipe. So take the measurements with a grain of salt and if you think the soup needs more water, give it more water.
This blog will not be simple, or at least, not all the time. I really enjoy a challenge. I get excited when I see a recipe with a long ingredient list. (Within reason, anyway. I recently read a cookbook where every third recipe had two half-page columns of ingredients. Aie.)
This blog will not, however, include impossible ingredients in these possibly-lengthy lists. I have a few blogs I love but despair of. They will describe a recipe that sounds incredible, only to inform me halfway through that I need tamarind paste. I will immediately realize that I didn't like the recipe well enough to hunt down an Asian grocer who might carry tamarind paste. On the contrary, while spelt flour always sounded obscure to me, I discovered you can get it at your local Bulk Barn. I'm likely to mention this, however.
This blog will not contain good photography. As I said, I'm no photographer. I hate a recipe without a picture, though, so I'll do what I can.
Can you tell that I also like the sound of my own voice? Or, at least the flow of my own print? Alas, it's true. I'm a writer; it's my fatal flaw. So, that all said, let's begin.
New is in quotes for a reason. I've been blogging since 2005; somehow--and this is going to blow your mind so get ready--somewhere along the way prattling about my life got old. So this blog has waddled along toward its inevitable deletion for a few years now. Yet, I never quite got around to it. Then I got a new idea.
This blog has been polished, primped and prepped in anticipation of its reopening. It has been made faster, stronger...tastier?
It has become a food blog.
You're flabbergasted by my originality, I know, but please hold all applause for the end.
You see, I've had a burgeoning interest in cooking, baking and food for some time now. I've been taking pictures like a good little foodie (even though I am no photographer), reading other blogs, putting new cook books on my Amazon Wish List and feeding my husband all kinds of things he doesn't actually like. Then a few months ago, when I'd quit my day job in anticipation of a move, someone asked me what I'd do in the interim.
"Write," I answered. For some reason I assumed everyone in the office knew that I was a novelist, albeit an unpublished one.
"Oh!" they cooed. "A cookbook?"
(Through my Facebook updates, my meals had acquired some degree of status around the office.)
No, I thought, but not a bad idea.
While this is no cookbook, I felt it was time for me to start to share my ideas with the world. That's what I like best about writing--the sharing. Food is just one more good excuse.
I want to meditate a little on what this blog will be, then, and give you a feel for what I'm about.
This blog's meals will be cooked in a small space. This is a big part of the point of this blog. For the next few years, at least, I am damned to an apartment's kitchen that I can't, due to the fact that I don't actually own the space, change much about. I have very limited storage, limited counters and a fridge door which falls off (Landlord is STILL swearing he will fix it soon). None of this, however, is a deterrent to the determined!
This blog's meals will be small. I cook largely for my husband and I; there are no children and the cats sniff a lot but don't eat much. The single exception is my soups. I am incapable of making less than eighteen batches of soup.
This blog's meals can be made by hand. What I mean is, I will very rarely write about something that you can't do with a spoon, a whisk, a spatula and a metal bowl. While I've acquired things like stand mixers and food processors in the last year that make my life a lot easier, I have whisked meringue by hand. I (prefer to) make bread by hand. I anticipate someday making my first batch of ice cream this way as well. "By hand" can be slow, it certainly requires more effort, but if you really want to, you can do it.
This blog's meals will be made from scratch. I am actually famously bad at preparing pre-packaged products. I have turned rice into mush and Betty Crocker cakes into bricks. However, what this also means is that I advocate the whole-food, home-made movements going on. I am currently making an effort to know exactly what's in my food. I am steeping my own vanilla, brewing my own tea and preserving my own lemons. These things, you will find, are ridiculously easy.
This blog will talk about reusing. I am married to a man who more or less taught me to care about recycling. This attitude has changed me and my habits. Plus, the city of Toronto is aiming to force people into reducing their weekly garbage by accommodating a huge amount of recycling and green bin refuse. I appreciate the effort. Vegetable peels, ends and brown bits? Keep them for the stock pot.
This blog will take short cuts. Please forgive me. Sometimes I am just tired. Sometimes we will just order pizza. Sometimes I'd rather grab a damn high-sodium can of beans than cook some for two hours because I forgot to soak them overnight. I'm not a purist.
Settled? Good, then. Some things I won't do.
This blog will not be political. I enjoy reading other foodie bloggers' takes on the last Pollan article, the revelation of this or that practice, the reason for eating from a CSA rather than a Sobey's. While I have my own set of principles that will become clearer with time, I do not enjoy hashing such things out, particularly.
This blog will not be exact. You can blame me, here. I do not, for the most part, measure as I cook if I'm not using someone else's recipe. So take the measurements with a grain of salt and if you think the soup needs more water, give it more water.
This blog will not be simple, or at least, not all the time. I really enjoy a challenge. I get excited when I see a recipe with a long ingredient list. (Within reason, anyway. I recently read a cookbook where every third recipe had two half-page columns of ingredients. Aie.)
This blog will not, however, include impossible ingredients in these possibly-lengthy lists. I have a few blogs I love but despair of. They will describe a recipe that sounds incredible, only to inform me halfway through that I need tamarind paste. I will immediately realize that I didn't like the recipe well enough to hunt down an Asian grocer who might carry tamarind paste. On the contrary, while spelt flour always sounded obscure to me, I discovered you can get it at your local Bulk Barn. I'm likely to mention this, however.
This blog will not contain good photography. As I said, I'm no photographer. I hate a recipe without a picture, though, so I'll do what I can.
Can you tell that I also like the sound of my own voice? Or, at least the flow of my own print? Alas, it's true. I'm a writer; it's my fatal flaw. So, that all said, let's begin.
Subscribe to:
Posts (Atom)