5.24.2015

All-triumphs on Allrecipes

http://allrecipes.com/Recipe/Prawn-Saganaki/Detail.aspx?soid=recs_recipe_seed
Prawn Saganaki


Salut, cats and kittens!

For once, my radio silence has a food-related cause.  That is to say, I've been cooking tons but very few original recipes these days.  (Not to say there aren't some coming......!)

The reason being, I've been working out new recipes as a member of the Allrecipes Allstars Canada team!  I was flattered to have been offered a chance to join up back in January and I've been getting back into the swing of Allrecipes amazing, community-driven recipe haven ever since.


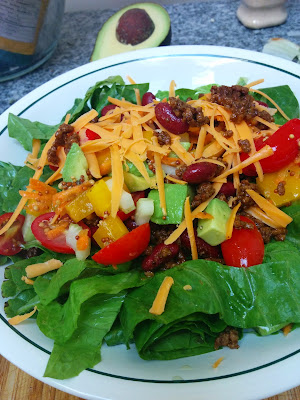
http://allrecipes.com/recipe/taco-salad-with-lime-vinegar-dressing/detail.aspx
Taco Salad with Lime Vinegarette


Soon, the other Allstars and myself will be working with sponsored posts that may demand a little more publicity.  I'm SO excited to get started and give the blog a little love at the same time :)

In the mean time, I thought I'd share a couple of the amazing recipes that have won me over in the last few months.   These guys have definitely merited repeated execution :)


Combo recipe:
Sweet Almond Flaky Pie Crust + Shelly Hospitality's Blueberry Turnover Hand Pies


Lastly, this is also a good hold-out post until I get my affairs in order this summer--partner and I are MOVING!  My new kitchen is steellllarr and I can't wait to start creating in it.


Happy cooking!


4.04.2015

Shrimp & Spring Vegetable Sauté


It isn't a sauté, strictly speaking, because I let the food melt together at a lower temperature than sautéeing calls for.  This means you have the time to literally prep the food as you're cooking it, which is a nice bonus when you don't feel like doing the mise en place thing with any sort of real gusto.

I have no story for you here, no cute opening.  Just a one-pot meal with lotsa veg and a drool-worthy sauce.  I may have literally licked the plate to get the last of it up.  A civilized nother person may have just made sure they had a little bread in the house.

FYI, the portion is large because there is no grain element here [that would have required another pot and slowed me down in getting to fork-to-mouth time].  So if you did put this over/beside rice, quinoa, whatever, it may be more than one meal.

Me personally, I'm not sharing my feta with nobody.

Shrimp & Spring Vegetable Sauté

Serves 1
Ready in 20 minutes

Note: Because vegetables can vary so much, I will tell you that my asparagus was thick-ish, not the pencil kind.  If you have the thin ones, go 7-8 spears.  My zucchini was medium size/age.  If you have a smaller, younger squash, cook it for a little less time.  My tomatoes were cherry.

Also, if you're tempted to throw this all together in the pan at the same time, please refrain.  All these veggies have different cooking times and to get them tender-crisp together, you have to time it.  Otherwise your zucchini and tomatoes particularly will go to mush.

5-6 spears asparagus
12 deveined shrimp, 31-40 count
1 Tbsp salted butter
1 1/2 tsp oil
generous black pepper
1 heaping tsp oregano
1/2 tsp garlic powder
1 Tbsp wine
3 inches zucchini (approx 3/4 cup)
5-6 tomatoes
1-2 Tbsp feta

Cut the asparagus into 1 inch sections.

Put a pan on the stove on low heat and add the fats.  When the butter is melted, swirl them together and then add the asparagus, shaking to coat.  Increase the temperature to medium-low.

While that's cooking, deshell the shrimp**.  This shouldn't take you long, but all-told, don't let the asparagus cook for 4-5 minutes.  Add the shrimp to the pan.

Generously coat the asparagus and shrimp in black pepper.  Add the other spices and shake/stir to combine.  Add the wine.

Chop the zucchini into 1/4 inch slices and in approx 4-5 minutes, when the shrimp are about halfway cooked through, add the zucchini.  Shake to get everything coated nicely.

Cut your tomatoes in half.  In another 4-5 minutes when the shrimp appear opaque on all sides, add the tomatoes, stirring to coat.  Cook just one more minute to warm the tomatoes through.

Pour everything on to a plate, top with crumbled feta and don't forget to scrape the pan clean of any of that awesome sauce.

Serve with bread so you don't have to lick the plate.

**Keep the shrimp shells if you would ever make a seafood broth - they will be an awesome contribution!  You CAN freeze the shells and dump into a stock pot much later, even if they were previously frozen shrimp to begin with.  (Re-freezing food is generally only an issue because it removes moisture from meat.)  Your homemade seafood broth would go especially well in my version of cioppino!

12.24.2014

Salmon Quiche with Bacon, Asparagus and Goat Cheese (crustless)

Hmmm.  Facelift, you say?  Clearly, that seemed like work.

But!  While our gourmet dinner club flounders, I have an exciting new inspiration I'll be sharing soon that will hopefully kick-start my sharing in 2015!

What's going on now?  Well, my cooking group is having attendance issues--this is life for adults who work full time, try to go back to school and have, you know, lives beyond that.  I was gifted a trip to an excellent cooking school class booked in the new year and THAT'S very exciting.  And I've been talking about blogs a bunch for unrelated reasons.  It was all bound to come full circle.

In the mean time, have leftovers to get rid of?  I did.  (And not the Christmas kind.  Yet.)  Apparently two people don't take apart 2.5 lbs of salmon very quickly.  Quiches are great because they're incredibly durable, flexible, easy to transport and warm and generally just an extremely forgiving dish.


A note on the quiche itself: You're welcome to put this in a pie shell.  That's just never my favorite part and I'd rather shift those calories into delicious fillings.  Speaking of fillings, this quiche is salmon-heavy.  You could probably reduce the salmon by an ounce or even two and still end up with a very nice quiche.

Further, say you don't want salmon in here.  You cooked two chickens last Wednesday and you've got a carcass you need to strip.  Use that.  (Or, duh, that Christmas turkey.  I did one early turkey dinner already and some of it went into a version of this quiche with red peppers.)  And it's winter so you want to know why I inserted asparagus - go ahead and use peppers and mushrooms.  You don't like goat cheese.  Sub in swiss.  I think you see where I'm going here.

If you want to freeze the quiche, bake it, let it cool completely, and put it very well-wrapped (and flat; it will break or squish if you manipulate before frozen) into the freezer.  When the time comes, reheat from frozen at 325 for 20-30 minutes with a foil cover so it doesn't over-brown.


 Salmon Quiche with Bacon, Asparagus and Goat Cheese (crustless)

9 oz cooked salmon
4 rashers bacon
6-8 stalks asparagus
1 green onion, sliced thin
1/2 cup goat cheese
1 1/2 tsp pepper
1 tsp salt
5 eggs
1/4 cup heavy cream
1/4 cup milk

Preheat the oven to  375 F.

Break salmon into hunks (doesn't need to be precisely bite-sized; you'll cut it into servings as well).  Your asparagus stalks depend on how thick they are.  Eyeball it!  Then chop them into 1/2 inch sections.

Place salmon, bacon, veggies and cheese into one large bowl.  Don't break up your goat cheese too much--the real flavor impact of goat cheese will get lost if it's in tiny pieces.  Crack over the pepper and add salt.

In a second bowl, whisk eggs, cream and milk.  I was going for a mid-range cream consistency as there was extra whipping cream and we drink skim.  You could alternatively use 1/2 cup 10% cream OR I've even tried 5% when I realized I was nearly out of dairy and it worked just fine as well.  Mouthfeel will change, overall presentation or edibility of the dish will not.

Pour the whisked egg mixture over the other ingredients and stir to coat very gently.

Pour everything into a buttered 9" pie plate.  I use a pyrex dish and it comes out very nicely but you could put down parchment if you're concerned about sticking.

Bake for approximately 45 minutes or until the top is brown and the center isn't wiggling like custard.

If you chose to freeze the quiche, pop it in the freezer after it's come to room temperature.  Remember not to let it bend or get squished until it's frozen solid.  To reheat later,  use a throwaway pie plate and bake from frozen, covered in foil to keep from over-browning, at 400 for 25-30 minutes.

4.19.2014

Update and a Refresher

Hey all,

Life's gotten in the way of updating for a while now. This is not to say I don't have eight recipes waiting in the wings for their turn to shine, however.

Proscuitto, Roasted Garlic and Goat Cheese Crostini

I'm pretty excited to be sharing an updated version of this appetizer which, if you're me, can be used alternatively as an incredible one-man lunch. 

This app was one of my first things I ever posted to the blog and it's a little painful looking back.  No photo, no real measurements, these pseudo-fancy, stumbling-around-in-the-dark directions...  You definitely see all the places you didn't know what you were doing. 

Happily, that's all been fixed up.

Coffee Martini
I've also been hoping to do a blog re-design for a while now.  Various attempts have stymied me because, let's be real here, I'm no designer and Blogger's templates will only take you so far.  Equally important, though, is that I think the tone of the blog has evolved since I first imagined it.  I naively thought I was working in a difficult space when I started this blog.  To be clear, I have (especially since we bought an island and microwave stand) copious amounts of space compared to most apartment kitchens.  I'm actually quite blessed.  I still try to work in the parameters of simple techniques and tools, but the facts are, most people can't construct a five-course meal in an apartment and still have room to breathe.

(I can't, either, but I tend to take up copious amounts of room when I'm cooking.)

The new concept/image is close to gelling for me so you'll probably see a face-lift soon.  You'll also see this excellent coffee martini recipe!  (Much sooner than the face-lift.)

In the mean time, thanks for hanging out with me.  I have a couple of consistent readers these days (at least, according to the analytics), so considering my absenteeism and my general lack of trying when it comes to accruing an audience, I feel pretty special.

Talk to you soon.

2.02.2014

Cassoulet-Inspired Stew


For some reason a few years ago, I got obsessed with cassoulet.  Not sure why; occasionally, I just fixate on a dish.  I read about eight recipes and then seared some sausage and chicken in the same pot and made a soup.  

Authentic, non?

Over time, this cassoulet-inspired stew has taken on an ultra-flavorful life of its own.  There are so many flavor notes in this thing I barely know where to start.  As an added bonus, I will also tell you that if you’ve roasted a chicken lately, the two thighs and other remaining meat on your carcass will be a perfect amount of meat for this stew—and since you’re already cleaning off that carcass, throw it in a pot and get yourself some stock base too.

This stew is also chock-full of protein, which is important to me as I lift weights and muscle growth means lots of protein intake.  It’s also on the rich side—the sausage fat gets folded back into the sweating veggies but you can skim it easily when cold and the reheated portions get better and better.  Or, if you're really kicking it in the gym, enjoy your slick of savory yum.

Cassoulet-Inspired Stew

2 sausages, sliced in to ¼ inch rounds*
½ onion, diced
1 large carrot, diced
2 cloves garlic, minced
4 ½ cups chicken stock
1/3 cup white wine
Bouquet garni  (several springs fresh parsley, 5-6 sprigs fresh thyme, 2 bay leaves)**
½ tsp celery seed
Salt and pepper, to taste
1 (19 oz) can white kidney beans***
1 ½ cups chopped, cooked chicken
Parmesan rind, optional
2 cups (loosely packed) rough chopped kale
Extra chopped parsley, for serving

Cook sausages in large soup pot on medium-low heat.  I didn’t specify because almost any type of sausage would work here—I prefer bratwurst as that sage-y stuff is my favourite.  Allow some fat to melt before the meat really gets its sear on.  When cooked, remove sausage rounds from the pot and set aside; retain rendered fat.  

Place onion, garlic and carrots into the pot and sweat for 8-10 minutes, or until they’re golden, soft, and their juices have cleaned up most of the brown scrummies on the bottom of the pot.

Return the sausage to the pot (and any accumulated plate juices); add the next six ingredients.  Bring the pot to a gentle simmer, uncovered, and cook for another 30 minutes, skimming occasionally.  Allowing it to stay uncovered means it will reduce just a little and thicken up.

In the last five minutes of cooking, grab your kale and stir it into the stew.  When it’s cooked down and wilted, pull the bouquet garni but if you’ve used parmesan rinds, leave them in until the soup’s done.  It’ll just ooze salty cheese taste into the soup indefinitely.

For serving, sprinkle on the extra parsley.  A crusty, seedy loaf goes really well with this broth.


*Tip: To make this easier and keep your knife less goopy, freeze sausage for approximately half an hour before slicing.

**Bouquet garni are just a bundle of herbs.  I place mine in a tea bag rather than tying them up as it’s neater.  I didn't chop the herbs into the soup to keep it a little clearer but that's definitely a fine alternative.

***You could substitute nearly any bean here but I prefer a light-colored variety for aesthetics.  In the version pictured above, I'd used canned chickpeas as they were what I had on hand.

12.29.2013

Traveling Crock Pot Christmas - Roasted Chicken with Gravy


The girls and I could not be more thrilled to have put together a Traveling Crock Pot Christmas potluck.

I had the pleasure of hosting--we have a fireplace and it's always great to have an excuse to break out the wood and matches!

 Almost a year ago, myself and three other women assembled our Traveling Crock Pot--a monthly get together hosted by one of us in turns to make the kind of food we usually only dream about.  We've had beef tenderloins topped with garlicky, bacony cream cheese; creme brulees; handmade raviolis; ceviches; amaretto sours; crunchy-and-soft corndogs with spicy mustard; salted caramel cheesecake with apples and, most recently, a jaw-dropping beef wellington.

What a tiny portrait of a drool-worthy year!

The idea was to break out of our comfort zones, to learn, to share food with other folks who love food and have more time with our friends.  Almost all of us have missed a dinner for various reasons, but we made a point of ensuring that for Christmas, our first-ever potluck dinner could be all of us together, and for once, including our significant others as well (the lucky boys!).

My contribution to the Christmas Crock Pot table was roasted squash boats (an old family favorite) and a couple roasted chickens.

I've always loved roasting a chicken.  My very first one came out as perfectly as I could have ever hoped (or so I thought then.  I've learned a few things since!).  And why not?  Roasted chickens are among the simplest of things you can cook.  They can come in a half a hundred flavors depending on your preference.  But doing it well so you don't end up with a dried-out bird takes a few, simple techniques.


Roasted Chicken with Gravy

Note: To roast my chickens, I employ a time-and-eye method of checking done-ness.  I have roasted a lot of chickens and I rely on my experience and careful food-handling to keep my meat germ-free.  To be safe and if you're feeling unsure, it's always safest to stick a thermometer in the fattest part of the bird, away from the bone, and get the bird to a minimum of 165 degrees.  Meat does continue to cook while resting so you are probably safe a couple degrees lower but for safest meat, the thermometer should guide you.

All for juiciest meat, this recipe employs brining.  I highly recommend anything Rouxbe offers and have consistently used their All-Purpose Brine to great success on many occasions.  For single or multipe birds, you will need to increase the base recipe they provide.  Brining requires you to begin your chicken prep the night before.

speciality tools: roasting pan

 2.5-3 lb chicken, brined
2-4 cups chicken stock
seasoning


Prep: Before brining, wash your chicken.  Check out the inside and make sure there aren't organs left in there.  If there are stubs of feathers in the meat, this is NOT the best time to pull them.  Leave them for the moment.

Brine chicken overnight.

In the morning, pull out your chicken.  Why did you brine it?  Because you're artificially inflating its juice factor.  The chickens I brined gained around 45g overnight.  This is how you're going to protect your white meat from drying out.

This is the time to get rid of those feather stubs.  Grab a pair of tweezers just like you're deboning a fish.  The skin is porous from its soak and the feathers will slide right out.  Do not trim down fat from the chicken around the back--all rendered drippings will be made more flavorful with this in there and the gravy will get defatted later.

Pat chicken dry and place, without trussing, on a plate in the bottom of your fridge.  Do not cover--the air-drying time through the day will help your chicken skin get that ultra-crispy texture we all covet.

About an hour and a half before dinner, preheat your oven to 375.

Pull your chicken out.  Unless you like doing the my-cold-hands-are-cramping dance, let it warm on the counter for about 15 minutes.  I still like flavoring the breasts with a compound butter but this is not a protect-all cure for juicy-ness in your white meat; butter alone will not save you.  In this recipe, I juiced a lemon and poured half of this into a Tbsp of butter with a big whack of chiffonaded sage, salt and pepper.  Mash these together (potentially while your chicken is sitting out losing its chill) and boom--compound butter.

Place bird in roasting pan, breast up.  A pan with a rack is ideal so the bottom doesn't get soggy but a dollar-store foil pan will do as well.  Lift the skin all over the chicken and stuff the butter equally down both sides of the bird.  Massage from above the skin to even distribution if necessary.  Drizzle with olive oil and remaining lemon juice; coat the chicken with your hands and salt and pepper the bird.  Be more liberal with the pepper than the salt; it did sit in a salt bath overnight.  Stuff with onion quarters, smashed garlic, lemon husks, extra sage...whatever aromatics catch your fancy.

Pour in as much chicken stock as necessary until there is 1-2 inches in the bottom of the pan.  This serves the dual purpose of steaming your chicken as it heats for even cooking and being a key component of your gravy later.*  Place a piece of tin foil that's been ripped by one-ish inches for venting over the chicken.  Place in oven.

After half an hour, remove foil and baste chicken.  Replace in oven.  You may baste again later if you'd like but it's not necessary.

Let cook through to final cooking time, whatever that happens to be.  The twenty-minutes-per-pound rule usually falls out pretty well if you're not sure.  I usually go a little over for extra crisp.

Let the bird rest for about 15 minutes.

Achievement Unlocked: Juicy Roasted Chicken!

While it's resting, pour out the bottom of the pan into a clear measuring cup.  Let the fat rise to the top (yes, seriously, all that top part is fat) and scoop off as much as you can with a shallow spoon or siphon off with your baster.  Pour back into a small pot, bring to a simmer, and reduce as much as possible while your bird is resting.  A small squeeze of lemon or dash of white wine is nice here.  If you want thick gravy, you'll have to add a cornstartch slurry or some such.  Me, I'm happy with this reduced goodness.  When you're ready, strain this into a gravy boat, carve your bird, and get this food on the table!


*NOTE: If you would rather roast vegetables in the chicken drippings (primo delicious), pour stock in a pot instead, season with a splash of lemon juice and reduce by half (will take upwards of 40 min; reduction is not a speedy process).  You will be left with a beautiful jus if you're using natural chicken stock--the store-bought stuff will reduce to a slurry the consistency and taste of the Dead Sea.  Add harder vegetables (carrots, onions, fennel) halfway through cooking.  Add softer veg (mushrooms, asparagus) about twenty minutes before you're going to pull the chicken.

12.15.2013

Traveling Crock Pot, Third Edition


I am honored, as ever, to have the illustrious Becky Issenman photograph my food!

I literally didn't remember to take a single picture of the finished products so if you'd like to see any of these recipes realized, check out Mrs. Becky's shots.

Menu

White bean soup with sage and prosciutto
(Not as much fat comes off prosciutto as the pancetta recommended in the recipe.  I prefer a flaky crisp on top of my soup and thus, prosciutto.  If you do as well, find some extra lard or butter to sweat your onions and garlic in.)

Bouef Bourginon
amended from food.com


Bouef bourginon is famed for being an enormous, time-consuming dish.  This is not untrue.  But you can take the heart of the dish and reduce it to be more amenable to the average cook who does not wish this dish to be the centre of their universe for five or seven hours.

I will show you my version listed below.  Keep in mind that these measurements are flexible--this has been adjusted to my taste but frankly, there are so many flavors that are so powerful here, you can fake it pretty well with any approximation of the recipe.  You can see this sentiment in the ingredient list itself--I want you to chunk and smash vegetables.  This is not a science.

That being said, while the ingredients are not exact, the method is.  Please read carefully--some professional tips I've learned to take this dish from good to great follow.

Serves 6 

specialty tools: cheesecloth (optional, but very useful)

3 oz thick-cut bacon
1 1/2 lbs stewing beef, trimmed of excess fat and cut into cubes
1/2 large onion, chunked
1 large carrot, chunked
3 cloves garlic, smashed
2 bay leaves
several large sprigs thyme
several large sprigs parsley
3 Tbsp all-purpose flour, divided
1/2 Tbsp tomato paste
2 1/2 cups red wine, divided
2 1/2 cups beef stock, divided
1/2 pound cremini mushrooms, quartered
2 Tbsp butter
 9 small carrots, preferably a selection of colors, with healthy green tops.
salt & pepper

Preheat oven to 450 degrees.

Cook off the bacon.  Once cooked, remove from pan and retain rendered fat in pan.  Note: Lardons are original in this recipe; I find thick-cut more accessible.  Thin-cut won't stand up to the dish.

Pat the beef dry.  This is that critical step so many of us learned from Mrs. Child.  Wet meat will take a hundred years to sear at which point, you will have cooked it through and that's not what we want here.  We want to get a nice, sealing crust on the meat.  So get the pan smoking-hot and drop in your cubes.  Sear until good and brown (this involves not touching them) and flip.  You may need to add more oil to the pan as you cook.  The meat should not be crowded and batches will be necessary. 

Achievement Unlocked: The Perfect Sear

Set all seared meat aside.  Place the chunked vegetables in the same pan and give them a light caramelizing as well.  Place vegetables and garlic into a bowl.  Toss with 1 Tbsp of the flour.  Add garlic, bay and herbs and toss lightly.

You will have what professionals call sucs in the bottom of your pan.  The brown, crispy flavor-wonders left behind by your meat and veggies.  Put the pan back on the heat and warm.  Pour in half a cup of the red wine and the tomato paste.  Stir with a gentle tool (I prefer a wooden spatula I have), scraping the pan gently to release the sucs and mix the tomato paste into the wine.  When you aren't feeling any more resistance or you can see the sucs have released into the wine, you've officially deglazed a pan.  Take it off the heat.

Achievement Unlocked: Deglazing a Pan

Place the beef in the dutch oven.  See the juices remaining on the plate?  Pour those into the deglazed pan.  That's 100% flavor you don't want to lose.  Toss the beef with the remaining 2 Tbsp flour and season with salt and pepper and place in oven for 3-4 minutes.  Toss the meat to turn, return to oven for another 3-4 minutes.  Turn the oven down to 325.

Crumble the cooked bacon and sprinkle it over the beef.  Take your cheesecloth and lay it over the meat.  Layer the vegetables and herbs over top.  The cheesecloth will allow all flavors to permeate and mix and, in a few hours, it will also allow you to lift the vegetables cleanly off the meat.  No picking thyme and parsley mush off your meat!  (Hat off to Bouchon for this tip.)

Cover meat and vegetables with wine sauce from your pan, remaining wine and 2 cups of the stock.  Throw on the lid.  Cook for at least 3 hours, more if you need the time.

Twenty minutes before you pull the dish out of the oven, prep the carrots.  Peel them and slice them lengthwise, leaving half an inch of green at the top of the carrot.  (Scrape around the top of the carrot with the edge of a knife to ensure no dirt is clinging to the place where the greens meet the carrot.)  Have two clean pans out.  In one large pan, sautee the mushrooms on high heat with butter, browning as you go.  In the second pan, place the carrots with the remaining 1/2 cup of stock.  Bring to a low simmer and braise until bright and crunchy-tender.

When you pop the bourginon out of the oven, pull the vegetables and herbs out.  They will be virtual mush--they were just there to flavor so you can green bin 'em now.  Skim meat and other residue out of sauce and into a clean cup.  Let the liquid sit long enough fat rises--defat the liquid and pour the remaining sauce into a saucepan.  Give it a strong simmer for 10 minutes or long enough to reduce slightly.

To serve, place meat, mushrooms and sauce in a bowl.  Top with three carrot halves of varying colors. Throw bread on the side of the plate for sopping up this ruby goodness.

If you're somehow blessed with leftovers, this stew only gets better as it sits.  Combine all ingredients and refrigerate.


Green Leaf Salad with Parmesan Crisp and mustard-garlic-parmesan dressing

There is really nothing to this salad.  Go wash some red lettuce, grate half a cup of parmesan and juice a lemon.

Now arrange the lettuce on the plate.

Pile the parmesan in a hot frying pan and use the back of a spoon to smooth out into the size of a circle you're happy with for your crisp.  Let it melt until the cheese is bubbling and sunk into a fine lattice.  Using a very thin tool, flip the parmesan and let it get golden on the other side.  When complete, transfer to salad or save.  Crisps are physically delicate but will keep well.  I made four crisps plus a little for the dressing with this half cup.

For dressing, mix together a teaspoon of mustard (a crunchy mustard is ideal in my opinion), very finely minced garlic (this is a dressing--don't cheat on your mince-work or you'll regret it) and half a tablespoon of parmesan.  Mix with a touch of salt, plenty of black pepper, lemon juice and olive oil.  Season to taste and let sit as long as possible before the salad is served to let the flavors meld.

Blue Cheese Walnut Bread
(Heed warnings in the comments section about the different rising times, particularly if you're not familiar with non-machine bread making.)

Cheesecake with Caramelized Apples and Salted Caramel Sauce

The cheesecake is a version of the one already on this website but sans chocolate and with a vanilla bean stirred into the milk and sour cream I warmed together for extra volume due to the lack of chocolate.  The crust was graham as here but I added cinnamon and cardamom.

Caramelized apples may be made by peeling and slicing an apple.  Toss the apples in sugar and cinnamon, ensuring thorough coating of the sugar.  Melt butter in a frying pan and when it is very hot, place apples evenly through pan.  After 2-3 minutes, flip apple.  Try to get a nice brown coating on either side; this is the sugar caramelizing and will give wonderful texture.

The caramel sauce recipe linked here has a great step-by-step guide and pictures.  Just remember melting sugar is hotter than boiling water so DO NOT under any circumstances touch it until cooled.  I did not add salt to my initial product but finished the plate with fleur de sel.

12.01.2013

Yes, You Heard Me--Lard!


I'm working hard to get into the head-to-tail movement.  I have enormous respect for the folks who already do this.  The fact is, however, that tripe and sweetbreads and brains still weird me out.  Most of you are probably not surprised and, in fact, are nodding your heads.  

What we can do as average home cooks who find lacy caul fat a little scary is make sure we make the most of what we do take home.  Figure out how to use the cheaper or unusual cuts to make them palatable (ham hocks); figure out how many ways the resultant by-products useful (jus) and never just chuck a bunch of bones (stocks).

For me, the next step involves getting into fat.

Is fat flavor?  Yes, absolutely.  Do I make involuntary faces biting into a quarter-inch hunk of white jello?  One hundred percent.

Don't get me wrong.  I love me some bacon.  Crisped-up fat edging a good pork chop is bliss.  Without tallow, hamburgers would be awfully sad, and a slick of schmaltz over roasted vegetables is a thing of bliss.

Quick lesson--

Schmaltz is chicken fat.
Tallow is beef fat.
Lard is lovely ol' pork fat.

I encourage you today to take stock of the excess fats in your kitchen.  They're easy to store, keep for a good long while, lend great flavors to your sear or sautee and have a medium-high smoke point.  That is to say, they'll burn long after butter, but you don't want to use them in a stir-fry.

Tallow skimmed off the top of cooled beef stock.


So where are the fats in your kitchen commonly found?

Real heritage pork chops, not the kind you find on sale for a dollar at your local chain grocery, have a good round of fat on them.  Even I, who like a little fat, do not want the whole quarter inch from those chops.  Cut it off and save it--what to do is coming.

Chicken fat off a roast can be saved.  Same with beef.  You may already leave the fat on the top of a bowl of homemade stock to seal it.  When you break it, do you just chuck the creamy layer on top?  You could skim that and hold on to it as well.  Fats from beef or chicken stocks are especially good used as the lubrication to soften your soup veggies in--you're adding a layer of flavor you're already trying to highlight in a chicken noodle or beef and barley.  I always boil my smoked ham hock before tearing it up for some Split Pea and Ham soup--the fat off the top of that cooled liquid has all the smokey, salty, piggy flavor of the original meat itself.  Why would you use vegetable oil when you can hug your diced onions with smoked hock taste?

Alright, you've sold me.  Now what do I do with those hunks of fat you told me to cut off my meat?

Well, friend, it's time to render fat.  This method can be used with any fats you have around but in my household, generally speaking pork is the product I buy with any "real" amount of excess fat on it that I'll remove before even cooking.

Rendering Fat

Note: With this scrap method, you will not have lard you can use to make pastry unless you like meat-flavored pastries.  Leaf lard is required from a pig to make snowy-white, non-meaty rendered lard and that's not what you'll be cutting off your porkchops.

fat
water
cheesecloth


You can do this with any amount of fat you like--photos here show the fat off of two well-fed pork chops.  Just two!  And I had enough resulting lard to slick a number of pans.

Take the fat you've removed from the chops and cut into small (a large dice is optimal for me) pieces.  Try to keep the pieces as uniform as possible; this will help an even rendering process.  The fat does not need to be completely meat-free; you don't have to scrape it clean. 

Place fat in a small pot and cover with at least an inch of water.  This doesn't need to be precise but it should be more generous than not.  Bring water to a gentle simmer.  Let the pot simmer, uncovered, for a while.

"A while" depends on the quantity of fat you're rendering.  Check it every twenty minutes or so to ensure it's not actually boiling--the water is there to insulate the fat with an even cooking temperature and render down the solids into smearable liquids.  The water eventually steams off and you're left with just the rendered lard.

You can tell the fat is rendered when it colors.  It will start to shrink and become golden just like fat you fry.  Little bits may float off and hang out at the surface.  Stir your pot once in a while to ensure the pieces aren't sticking to the bottom.


When the fat is totally shrunk and golden, you've rendered as much as you can out of it.  Place a cheesecloth over a sieve to ensure you catch even those little floating brown bits.  These would burn in further cooking and shouldn't be a part of your final lard.  Remember that fat can get hotter than boiling water--be very careful at this stage.  Pour the fat through the sieve into a heat-safe bowl.  Give the solids enough time to be cool enough to touch.  Bundle the cheesecloth with the rendered hunks inside and give it a twist over your bowl to get all your liquids out.

Cover with plastic wrap pressing directly down on the lard and move to the fridge.

If you're worried you didn't evaporate all the water, in a few hours, you'll find out.  The water will rise to the top of the fat and form beads on the surface.  Pour this off and put the plastic wrap back down.  This will have no ill effects.


Your lard can be kept in the fridge for a month or two or freeze for more extended life.  

Or don't wait--go fry some potatoes.

Want to read up more on fat?  Check out the highly-educational Fat by Jennifer McLagan or this love-song, Schmaltz by the omnipresent Michael Ruhlman.

9.08.2013

Shredded Beef Sandwich with Jus


 Despite  an overwhelming love of Arby's, I don't think you can count me as a roast beef sandwich connoisseur.  That's not to say I wouldn't like to become one!  This sandwich has me well on my way.

The root of the reason  is that I've never been much of a beef eater.  However, Pure Beef has changed my eating red meat drastically.  Whether it was because my mother never cooked much red meat (not so much as a meatloaf, from my recollection) or the frightening plethora of names given to the beast or that the first steaks I tried to cook came out like leather or a slight fear of all meats not totally well-done (gotten over that, thank god)....  Whatever the case may be, red meat has never really been on my radar.

Pure Beef rocked  my world.  Not only did Lynne Curry arm me with some serious knowledge, the recipes are bloody lovely.  She has created an avowed beef fan.

I have now picked up things like oxtail, shank, brisket strips, short ribs and beef bones.  I've yet to do a 'real' pot roast and I'll probably never grill a T-bone but it's a helluva step forward!


It was oxtail that first got me started on this sandwich I share with you now.  As I've noted before, Sanagan's is a great place to pick up meat in Toronto.  Unfortunately, the pic above was taken with grocery store oxtail purchased long before my love for Sanagan's began.  I think it's worth examining here, however, for the novice beef-eater.

Oxtail is not actually ox meat but the tail of the cow.  The nice folks at Sanagan's sell their oxtail in nearly-whole form but were kind enough to chop it into user-friendly 'discs' for me much like what you see above.

Oxtail can be browned and braised like short ribs or stewing beef.  But for the ultra-easy, I went for my slow cooker on this occasion.  Leftover sauce and meat from any of the above cuts or even a roast would be excellent companions for a crusty bun.  The below recipe is an extrapolation of that loveliness but in a less labor-consuming form.


Shredded Beef Sandwich with Jus

Creates enough for a bunch of sandwiches plus some snacky, hot-beef eating.

Please note: While not labor-intensive, this is still a two-day recipe. Plan ahead.  This dish could alternatively be made with beef shank.

Day 1

2 lbs oxtail
3 cups beef broth
1/2 onion, chunked
2 cloves garlic, smashed
1/2 Tbsp mustard powder
1 1/2 tsp Worcestershire
1 tsp whole peppercorns
6-7 sprigs fresh oregano
3-4 sprigs fresh thyme
water

Feel free to brown the meat first if you're feeling motivated.  I was in a rush.  I dumped the raw oxtail in the slow cooker.  Add all successive ingredients and enough water to cover by an inch or so.  This is not a science; don't worry too much.

Cook on high for five hours.

Carefully strain liquid into a separate bowl.  Remove meat from the solids and discard the remaining vegetables and spices.

Now for the messy part.  Oxtail has a lot of fat and collagen on the bones; separate it with your fingers to pluck the nuggets of meat out.

Refrigerate the meat and the liquid separately and come back tomorrow.

Day 2

This is the quick day--give yourself approximately 30 to finalize and assemble sandwiches.  The following ingredients are noted for one sandwich.

1 1/2 cups reserved beef liquid

3/4 cup reserved beef

1/2 demi baguette, sliced lengthwise
aged gouda or other strong cheese
1 Tbsp horseradish
butter


Oxtail has a ton of collagen--your liquid should now be a bowl of jello.  Remove the tallow (beef fat) and reserve for another use (this a super-stable natural fat--go fry/sear stuff in it!). 

Chunk out an approximate amount of the beefy gelatin into a small pot.  Turn on the heat to simmer--it will turn back to liquid the moment it warms up.  Reserve the rest of your gelatin for another use--further sandwiches, braising liquid, jus for another application, or freeze for fall soups!  This is true stock at its best.

Keep the pot simmering until it reduces by about 3/4.  You will be tempted to add salt at first.  Do not; a reduction salts itself.  This will take 20-30 minutes depending on your heat and volume of liquid.

While that's going, slice some nice thick pieces of gouda for one half of your baguette and butter the other half.  You may definitely use another cheese here but it needs to be strong to stand up and be recognized among the beef and the horseradish.  Throw these under a broiler to toast.

Nuke the beef to rewarm it (technical!).  Shred with your fingers some if it still appears in larger chunks. 

The buttered half will be done first--pull it out and smear with horseradish.  Apply the warmed beef. 

Pour your jus into a side dish so you can dunk the sandwich.  Pull out your bubbly, cheesy sandwich top, assemble, and CHOW DOWN.

8.18.2013

A Traveling Crockpot Dinner


While this is my first formal post about it, the Traveling Crockpot has actually been in my life for some time now.  A group of four gals get together once a month (mostly) where one of us hosts a dinner.  Really, it's an excuse to find our fanciest recipes we've always wanted to try out but couldn't justify (or had time for) making on a Tuesday night after work.  

My second Traveling Crockpot dinner was summer-themed (the first was a Middle Eastern Feastern!).  Located here are my personal photos...which, as usual, kind of suck.  But!  Happily, our group includes Mrs. Becky whose talent populates Little Siddall Studios with much more pleasing visual fare.

To Drink
Mango Balsamic  Spritzer with Mint

I'm not even going to try with a photo for this one; it was too lame.  Check out Beck's.

Don't get weirded out about a drink with vinegar in it.  It brings a totally unique brightness to the flavors.  If you live in Toronto, you can get excellent mango balsamic at Crescendo (two locations).

This drink could probably use a high-ball glass.  The structure is that of a mojito, but the two drinks share nothing else.

1 drink

1 tsp mango balsamic vinegar
2 sprigs mint
1 oz orange liqueur
3/4 oz vodka
Crushed ice
gingerale

 Strip the mint and muddle the leaves with the vinegar in a cocktail shaker.  You want a lot of mint; if your sprigs look measly, don't shy away from adding more.  

Top with enough crushed ice to fill your glass.  Add the orange liqueur and vodka (go for the good stuff!  I used Patron's orange liqueur and Grey Goose vodka).  Shake, and pour ice and all into the glass.  Top with gingerale to fill the cup.


To Start

Scallop-Mango Ceviche

Again, "real" photo here.

The ceviche was a big guessing game.  I googled a half a hundred recipes and cobbled together my own.  Use more mango than you think, make sure the scallops are bite size (I should've trimmed down even my bays), and toss in acid briefly.  All those recipes recommending 4-8 hrs are going to turn your scallops into rubber.


Main
Seared Pork Chop with Chipotle Butter and Avocado Mousse
Mango-Kholrabi-Radish Slaw

The chops are seared in a hot pan with butter and a little oil to keep it from burning too fast.  Don't use a nice olive oil--use a grapeseed or something else with a high smoke point that will allow you to sear the chops super-hot each side for just a few minutes to get that golden-crisp exterior.  A barbeque would be equally as awesome but I don't have access to one of those.

My chops were centre-cut, bone-in, local pork affairs purchased at the awesome Sanagan's in Toronto's Kensington Market.  Leave the bone in--it helps with moisture retention and is quite easy to eat around with this cut.

Chipotle Butter**

1/4 lb butter, unsalted, softened
3 chipotles, seeded and minced
several dashes liquid smoke
honey, to taste
cracked black pepper
good, flaky salt, such as maldon or fleur de sel, to taste

The butter in this recipe is unsalted for two reasons.  1) You need control over the salt to get the right balance.  2) The texture of crispy flakes of good salt are wonderful.

Put the butter, chipotles and liquid smoke in a large bowl--you'll want room to whisk vigorously.  Add approximately 2 Tbsp of honey, 1 Tbsp cracked black pepper and 3/4 Tbsp salt to start.  

Whisk together all ingredients until smooth.  This will take time to come together--it may seem like you'll whisk forever at first.  Be patient.  

Taste, add as needed, whisk.  Taste, add as needed, whisk. 


Avocado Mousse

1 avocado, very ripe
2.5 Tbsp heavy cream
juice of 1/4 of a lemon

You could make this mousse much more complicated.  I had enough flavors on the plate with the coleslaw and the butter and I didn't want to take anything else away from those amazing porkchops.  So this just became a fatty foil for heat and acid elsewhere on the plate.

Get the avocado into a bowl; doesn't matter how.  Add the cream.  Whip like the dickens.  Again, this will take time to come together.  Near the end, when it's almost perfectly smooth, add the lemon juice to keep it from browning.

Mango-Kholrabi-Radish Slaw

1 mango
1 kholrabi
5 radishes
acid
oil
1.5 tsp sugar

Matchstick the fruit and vegetables.  The kholrabi tastes very much like cabbage.  If you can't find one, actual cabbage would do; they're even the same color.  I found pretty little Easter Egg radishes for the rest of the color in this dish.

Mix the acid (I used a calamansi vinegar from Crescendo(as mentioned above)) and the oil.  Get creative here if you like--an avocado oil would be awesome, for instance.  Or use lime juice if you have leftovers from the ceviche.  I like a 2:3 acid to oil mix, personally, which may be a little heavy on the acid depending on your palette and what you're using.  Taste and adjust as necessary.  You'll need a little sugar but not too much--a nice ripe mango adds plenty here.


Dessert
Goat Cheese Pudding with Strawberry Rhubarb Compote

Another recipe not my own. While it's not photogenic, it's unbelievably good.  The singularly excellent recipe is here at Food & Wine.  I've made it twice, excellent results both times, but you must have some kind of acid (like the raspberries in their version) to cut this.

The compote was my own.  You simmer strawberries and rhubarb and a bit of water and a bit of sugar together for a long time.  I can't tell you anything more about that.

Bon appetite!


*I love the guys behind Real Food Has Curves which is sadly no longer updated.  I'm just so glad they left the links live on this old version of the site.  Their new materials exist here.  Also, having the thyme added to the apricot soup was crucial, imo, though they list it as optional in the original recipe.

**This is what's called a compound butter.  You can basically take any mash of flavors that appeal to you and use them in a compound butter.  Other suggestions would include rosemary, anchovies and garlic.  Sage.  Lemon and thyme.  Basil and black pepper.  Roasted garlic and chili flakes.  You get the idea.

To store excess (the recipe above provides plenty of excess), dob butter in a log-ish shape on a length of plastic wrap.  Use the plastic to make a neat log, twist off the ends, and toss in the fridge.  Lasts a good long while.

Compound butters can be used at room temperature, smeared on bread, dobbed on meats, as the gloss-and-fat addition to a sauce, cold disks to melt over your hot veg, as the fat to fry an egg in...  The list is pretty ridiculous.